15 RV Ceiling Ideas for RV Renovation That You’ll Love + Gallery
Have you started renovating your camper and looking for the right RV ceiling ideas? I have something to offer you. The ceiling takes up a huge space and revamping significantly impacts beauty and ambiance.
With the right solutions, it won’t have obsolete fixtures, boring colors, and accent pieces that will suppress. So, keep reading and uncover 16 great RV ceiling ideas you can consider for your next renovation project. Let’s dive into it!
Table of Contents
1. Installing Tongue and Groove Wood Planks
Cost: $0.25-$1.25 per linear foot | Difficulty of installation: Low | Durability: 15+ years
Besides their warm, appealing aesthetic, tongue and groove plank ceilings come in V-groove or beadboard styles for RVs. The V-groove has subtle linear ridges, while the beadboard features classic vertical ridges. Installation requires furring strips and an adhesive.

This ceiling is best for RVers with moderate carpentry skills or budgeting for professional installation. Precise measurements and proper installation are crucial to prevent gaps, warping, or separation over time with the RV’s movement.
2. Wood Panels Pallet for Camper Ceiling
Cost: $1-$7.5 per square foot | Difficulty of installation: High | Durability: 15+ years
A wood pallet ceiling adds a rustic, classic look but requires advanced planning and carpentry skills for proper, safe installation in an RV. While providing a unique, reclaimed wood aesthetic, using repurposed pallet planks is one of the more challenging DIY RV renovation projects.

It involves measuring and cutting the wood planks to fit the curved ceiling dimensions. Careful planning is needed to stagger the wood patterns and avoid excessive weight from full planks. Furring strips must be securely mounted before adhering and optionally face-nailing the planks. The complexity makes budgeting for professional installation wise for those without advanced skills.
3. Ceiling Makeover with Wooden Beams
Cost: $5-$20 per linear foot | Difficulty of installation: High | Durability: 5+ Years
While wooden beams provide warmth and a cozy feel through their natural insulation properties, they require professional installation in an RV using advanced tools and carpentry skills. It requires an expert carpenter with extensive experience working on RV roofs and ceilings. Precise measurements, weight load calculations, and secure anchoring into roof trusses are critical.

The process involves removing exterior roofing, using specialized sealants and heavy-duty lag bolts/screws to mount beams. Beams need custom cutting, sanding, and staining before installation within confined ceiling space. Specialized power tools like saws, routers, and drills and expert skills like beveled cutting and finishing are required.
4. Metal RV Ceiling Panels and Faux Tin Tiles
Cost: $2-$10 per square foot | Difficulty of installation: Low | Durability: 10+ years
Besides adding an elegant, upscale look to your RV’s interior, metal ceiling panels offer exceptional durability. Installing them is very straightforward; you need to nail or screw the panels directly onto the existing ceiling substrate. Before installation, inspect and repair any areas of water damage or potential leaks.

One of the great advantages of metal is that you can easily paint the ceiling panels any color to complement your design scheme and make them more visually appealing. Since metal is a strong material, it cannot crack, rot, or absorb odors or moisture like wood ceilings. Furthermore, adding a metal ceiling helps reinforce the trailer’s overall structural integrity by creating a strong, unified surface overhead.
5. Fabric RV Ceilings
Cost: $1-$5+ per square foot | Difficulty of installation: Medium | Durability: 15+ years
Fabric ceilings offer a clever way to create an attractive, customized look for your RV’s interior. You can drape the fabric for a soft, textured feel or flat mount it for a seamless finish. Draping works well with lightweight fabrics like cotton or tulle, using upholstery tacks or nails to secure the draped material to the ceiling. This technique allows you to achieve beautiful gathered effects.

For a flat-mounted ceiling, sturdy fabrics like vinyl or polyester work best as they won’t wear out, especially when wrapping the edges. A spray adhesive is recommended to firmly stick the fabric directly to the ceiling surface. One potential downside is that some fabrics, like cotton, can absorb cooking odors or stains over time and be difficult to clean thoroughly.
6. Vinyl/PVC RV Ceiling Material
Cost: $5-$10 per square foot | Difficulty of installation: Medium | Durability: 40 years
Renowned for their durability, the vinyl/PVC ceilings are suited to areas with high humidity. Installing them requires some basic DIY skills and tools. You’ll need:
- A utility knife or tin snips for cutting tiles;
- A straightedge for measurements;
- A caulk gun;
- A trowel for applying adhesive evenly.

The installation process involves precisely measuring the RV ceiling’s curves and angles, then cutting tiles to fit using scored cuts or tin snips. Following adhesive instructions is critical; applying it correctly and using a roller to set tiles firmly without bubbles is necessary.
7. Ceiling Paneling for RV
Cost: $4-$12 per square foot | Difficulty of installation: Low | Durability: 10+ years
Paneling is also an excellent RV ceiling idea for your next RV renovation project. It will incredibly beautify your travel trailer. Its installation and performance resemble that of plywood. However, it’s ideal as it comes with various patterns and colors, and you can also paint it.

The installation involves carefully measuring your RV’s ceiling dimensions, marking and cutting panels to fit using a utility knife or saw. Construction adhesive is applied in lines or beads; then, the cut panels are pressed into place and secured with nails or screws along the edges and into ceiling supports. Before paneling, ensure your RV is free from water damage and leaks.
8. Plastic and Styrofoam Ceiling Tiles
Cost: $2-$10 per square foot | Difficulty of installation: Low | Durability: 12+ years
The styrofoam ceiling tiles are light in weight and can be shaped or cut using scissors and fixed on the ceiling surface using a strong adhesive. Before sticking the plastic or styrofoam ceiling tiles, ensure the surface is free from leaks and dirt.
The installation process is simple:
- After ensuring the ceiling is clean, dry, and free of any leaks, tiles can be cut to size using scissors.
- A heavy-duty construction adhesive is applied to the back of the tiles, which are then pressed into place on the ceiling.
- Cutting tiles to fit tight spaces or corners requires some care, but the soft styrofoam is very workable.

Like other RV ceiling options, foam ceiling tiles such as the White Styrofoam Decorative Ceiling Tile Astana conceal many defects with their beauty.
9. Consider Fiberglass for Your RV Ceiling Material
Cost: $3-$8 per square foot | Difficulty of installation: High | Durability: 10+ years
Another great material for your ceiling renovation is fiberglass reinforced panels because they are light and thin, and you can glue them on the surface with a construction adhesive. However, I suggest you use brads at the ceiling fan, light fixture, vents, and around the edges to make the covering perfect.
The installation process of Fiberglass Reinforced Panels(FRP) is the following:
- Starts with ensuring the existing ceiling has no delamination, water damage, or potential leak areas that need repair.
- The FRP panels must fully adhere to a smooth, solid surface.
- Precise measurements are critical, as the rigid FRP requires cutting panels to fit the RV’s curved ceiling dimensions using a utility knife or saw.

The fiberglass-reinforced panels can last long as long as it is properly installed. However, you must ensure they are installed in a ceiling without delamination, water damage, or leaks. You can be sure this beautiful ceiling is easy to clean and waterproof.
10. Murals
Cost: $10-$20 per square foot | Difficulty of installation: Low | Durability: 20+ years
Besides the bed, putting a mural over the RV ceiling is an incredible idea. It can be the perfect finish for your entire ceiling with your desired paint. However, you must apply it tactically to make your RV interior walls and ceiling magnificent. Fortunately, RV owners can get hundreds of mural designs for ceiling makeovers from various websites online. The installation process is simple:

First, thoroughly clean and prepare the ceiling surface to ensure proper adhesion. Next, carefully measure the ceiling dimensions to order the correctly sized mural from a vendor. Many offer customized designs and patterns to fit your style preferences. Once the self-adhesive mural arrives, simply peel off the backing in sections and smooth it onto the ceiling, working from one end to the other. Finish by pressing the edges firmly for full adhesion.
11. Bamboo Grass
Cost: $2 to $10 per square foot | Difficulty of installation: High | Durability: 25+ years
The bamboo grass ceiling is an intriguing idea that turns your RV into a moving tiki hut. However, this is a highly challenging DIY project requiring exceptional skills. To full bamboo grass fencing pieces across the entire ceiling correctly you’ll need tools like
- A saw;
- A utility knife;
- A level;
- Clamps to measure and cut.

The thick bamboo slats make this labor-intensive and the material unforgiving if not installed perfectly level and seamless. It’s recommended for advanced RVers only. My favorite option is the bamboo paneling, which is only 1/16″ thick and comprises bamboo strips and fences. Installing bamboo panels requires liquid nails and heavy-duty glue to ensure every ceiling inch is well-covered and properly reinforced.
12. Wallpaper and Tissue Paper
Cost: $3 – $20 per square foot | Difficulty of installation: Low | Durability: 15 years
Using wallpaper and tissue is another creative way to cover your RV ceiling. Modern wallpaper options are numerous, with bold prints and subtle patterns. Others have a texture, which makes them customizable and paintable. Basic tools like a smoothing brush, utility knife, and adhesive are needed for installation.

For tissue paper RV ceilings, the installation is more time-consuming but still less difficult. You’ll need lots of tissue paper, a spray adhesive, paint in your desired color, and patience. Carefully apply the tissue in overlapping layers, painting over it to achieve your unique textured look, including around the ceiling vents.
13. Laminate Sheet
Cost: $8.5-$12 per square foot | Difficulty of installation: Medium | Durability: 10+ years
Laminate sheets provide an affordable yet elegant ceiling solution. At $50 on average for a 4’x8′ sheet, they are ideal for RVers on a tight budget. Despite being thin and sturdy, laminate sheets come in various patterns and colors.

Installation requires moderate skills like properly measuring, cutting the thin laminate with a utility knife, and adhering it seamlessly to the ceiling using a heavy-duty construction or panel adhesive. You will need basic tools like:
- A brush/roller;
- Straight edge;
- Caulk gun;
- Clamps;
- Sandpaper.
Once installed, laminate ceilings are water-resistant, easy to clean with a damp cloth, and low maintenance. This cost-effective camper ceiling material can last over 10 years with proper preparation and installation while providing style and durability.
14. Ceiling Fans
Cost: $150 – $350 | Difficulty of installation: High | Durability: 10 years
Adding ceiling fans is a great way to keep your RV cool in the summer while upgrading the look. 12V RV-rated fans can run efficiently off the battery system. However, installing them takes a lot of work, especially in shorter RVs. Proper mounting requires skills like cutting precise openings, wiring the fan correctly to your 12V system, and mounting it securely.

Before installing ceiling fans, first consider your RV’s height. For shorter RVs under 7 feet of ceiling height, ceiling fans may not be advisable unless you get expert guidance on selecting the right low-profile model and professional installation assistance.
15. Light Fixtures
Cost: $70 to $250 | Difficulty of installation: High | Durability: 5+ years
Upgrading ceiling light fixtures is an excellent way to modernize and brighten your RV’s interior space. When selecting new ceiling lights, pay close attention to the voltage requirements. Many RV-rated light fixtures operate on the 12V DC system and can run directly off the battery bank. Popular options like the RecPro Iron Sphere pendant lights provide a stylish yet energy-efficient upgrade.

If choosing 120V AC fixtures intended for household use, they will need to be converted to 12V DC operation using a step-down transformer. For safety, it’s recommended to have an RV technician or electrician install new lighting fixtures, especially when mixing AC/DC systems.
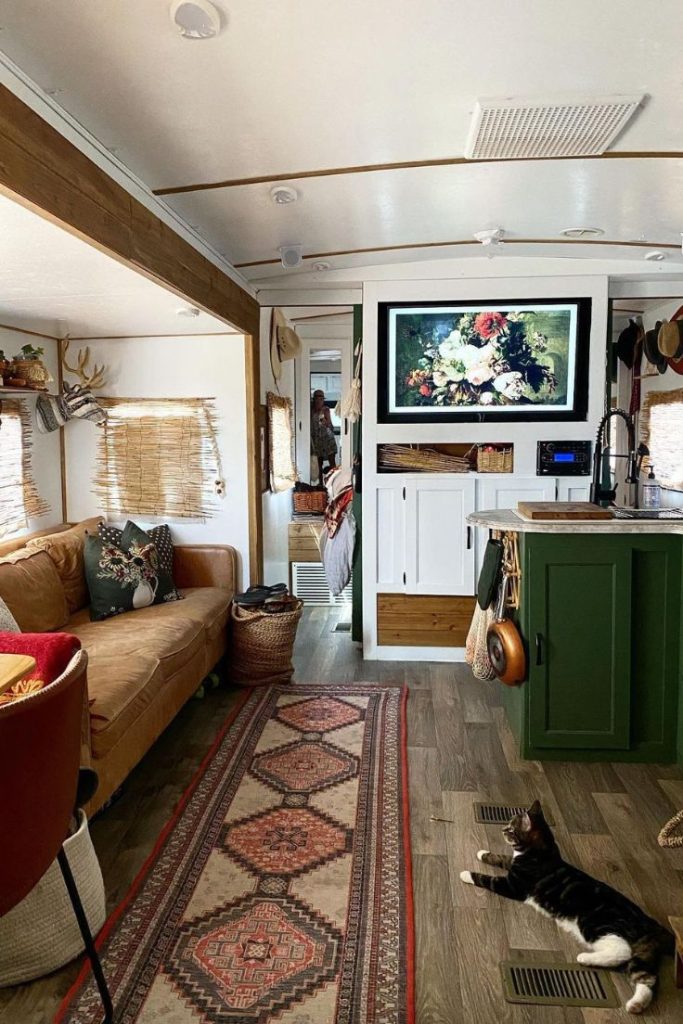
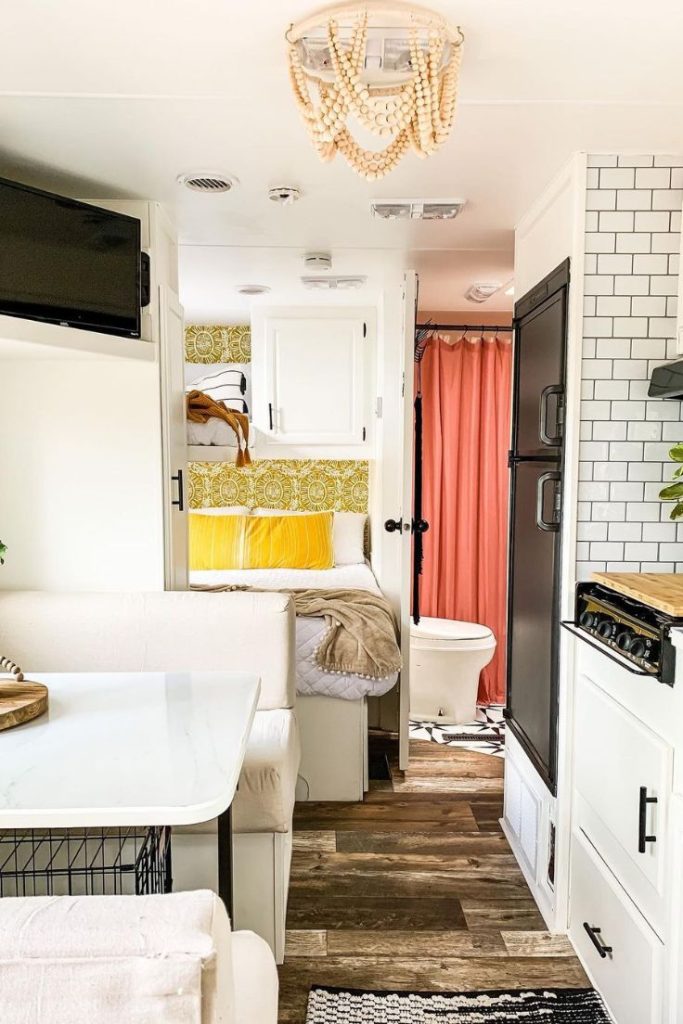
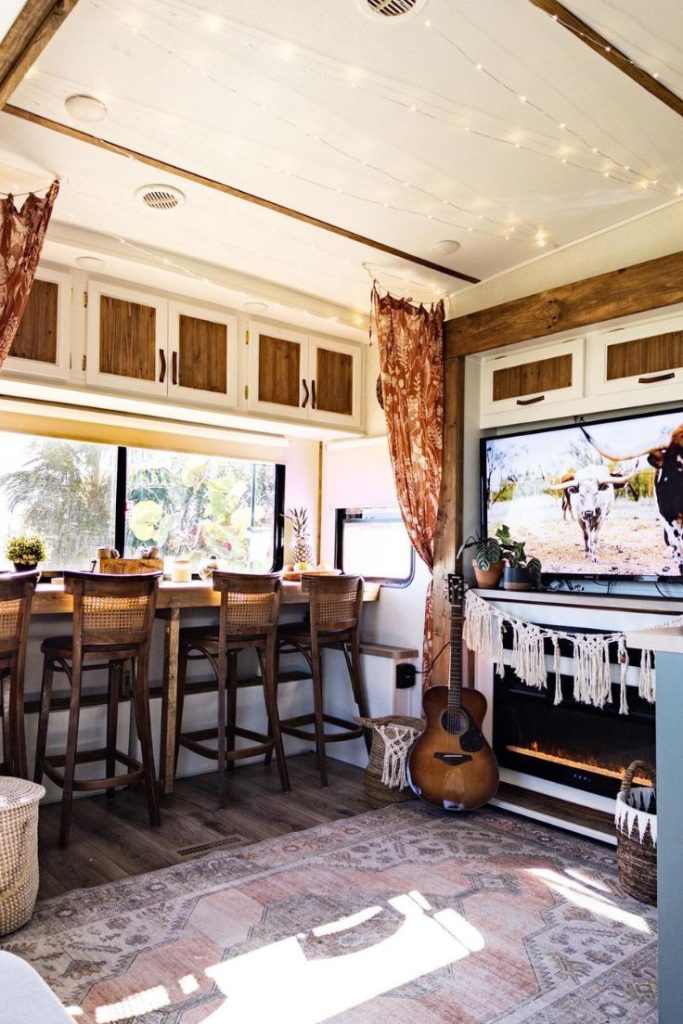
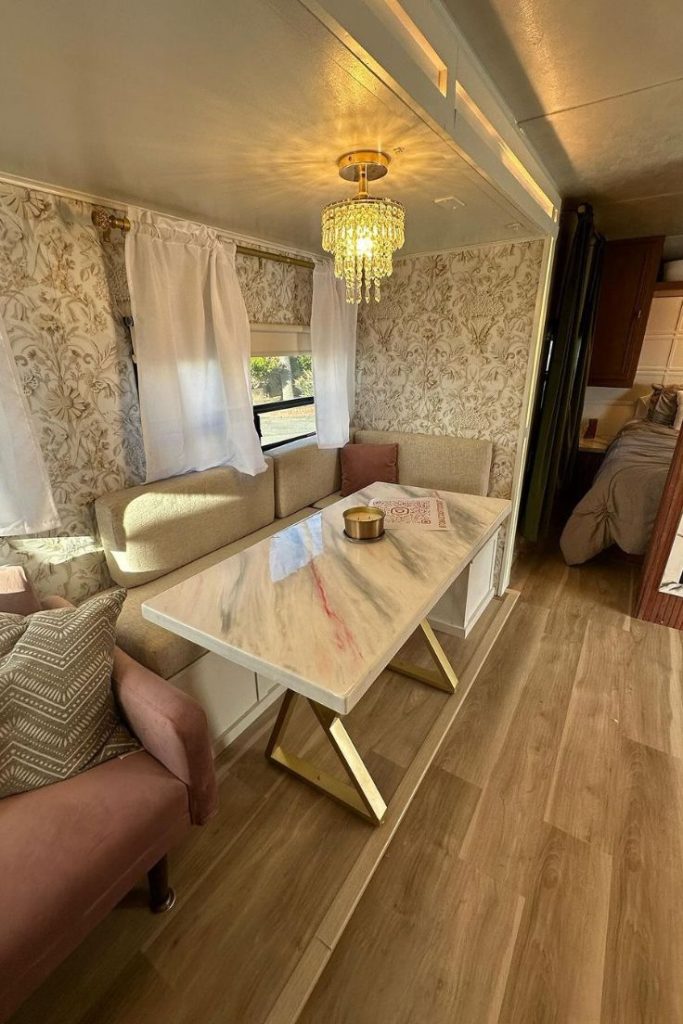
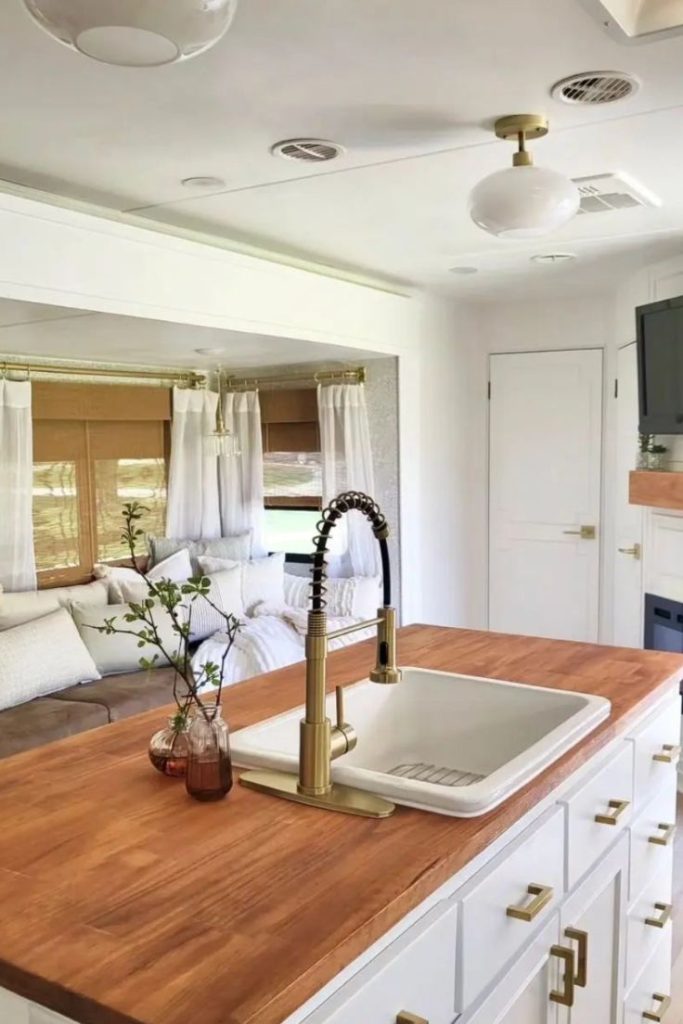
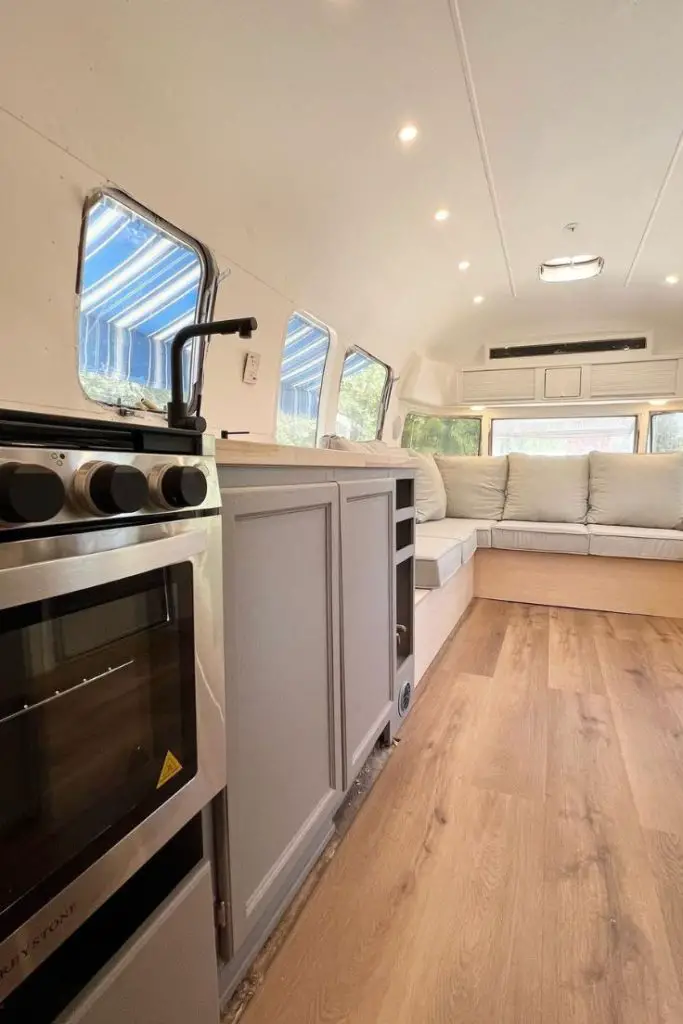
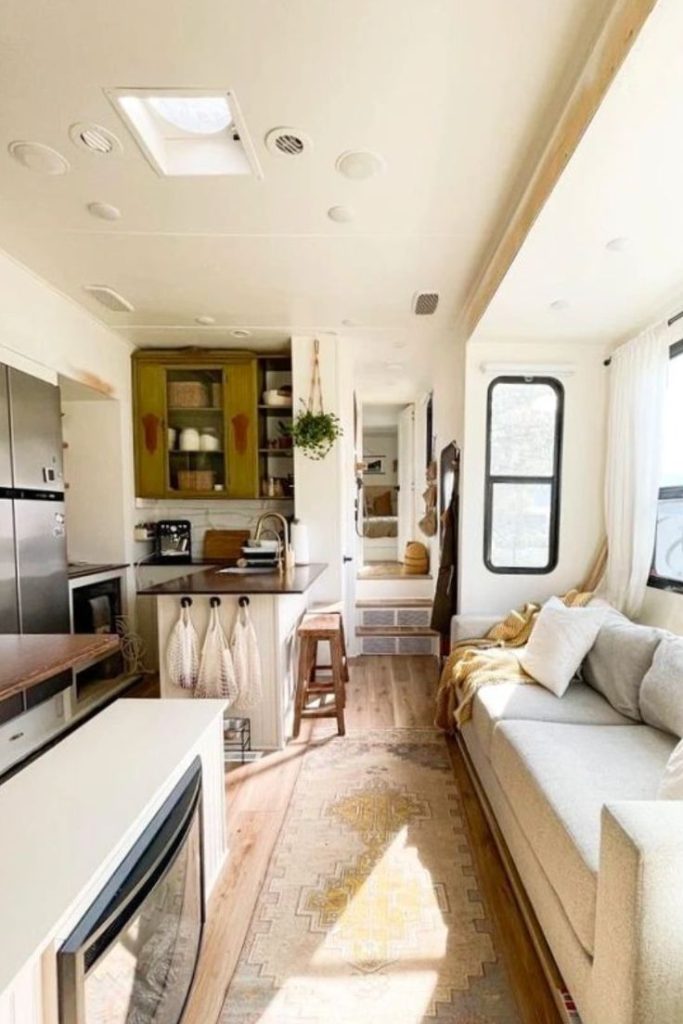
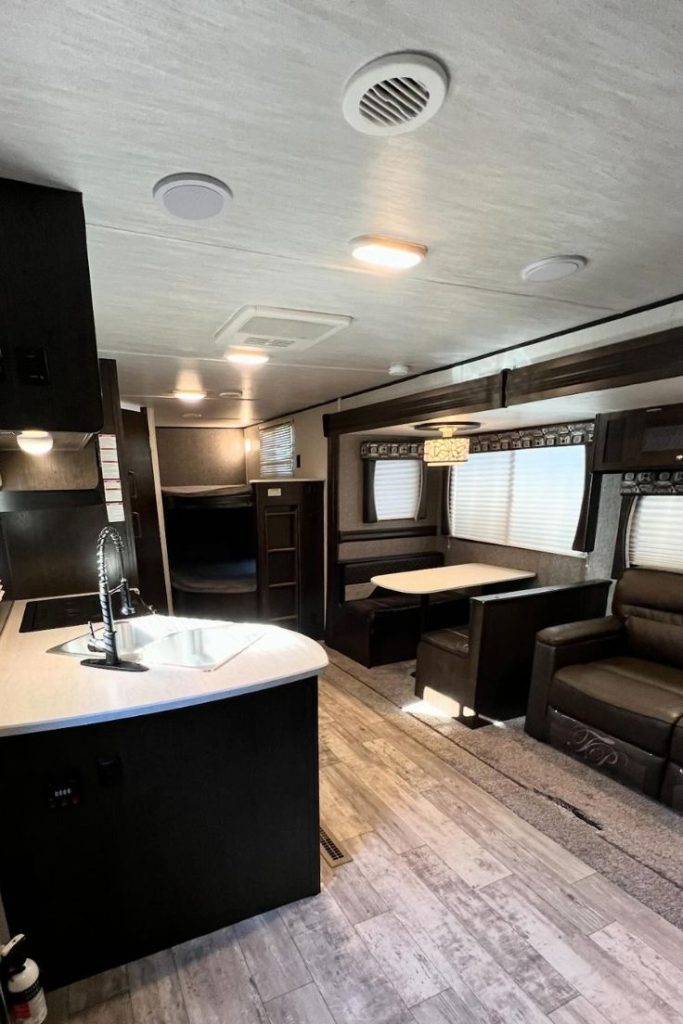
More RV Ceiling Ideas – Gallery
Discover even more RV сeiling ideas by browsing through this gallery:

Considerations for Selecting RV Ceiling Ideas
In your search for your RV ceiling ideas, consider the following factors:
1. Trailer’s Curves
I strongly advise that you consider your trailer’s curves, as they can make the installation of your RV ceiling ideas complicated. Many RVs aren’t flat but curvy and sloppy. If your RV has curves, use flexible materials, as they can bend to cover every inch of your ceiling space effectively.
2. Water Damage
Whenever an RV has water damage, renovating your RV becomes inevitable because the leaks will create yellow spots and make the surface soft. While dealing with this issue, don’t try covering real issues with cosmetic upgrades, as it will affect the structural integrity of the RV.
Therefore, tackle this issue with the help of a professional. If you procured a second-hand travel trailer, hire an expert to inspect the ceiling for water damage before buying it. Also, install an RV ceiling idea that can handle water effectively to avoid dealing with water damage in the future.
3. The Weight of Ceiling Materials
It is mandatory to check the weight of anything you intend to install in the RV, including the ceiling, to prevent it from being overweight. I advise using lightweight ceiling materials to ensure the RV doesn’t exceed its recommended total weight. Remember, towing a heavy trailer is dangerous.
4. Durability
While searching for the perfect RV ceiling idea, check whether it is long-lasting, as that will determine if you will derive any value from it. The longevity and reliability of the ceiling will be tested as the RV moves. So, using quality ceiling materials and adhesives is inevitable. Also, ensure your preferred ceiling is easy to clean and maintain.
5. Tiny Design
Patterns and colors can effectively make a small space appear bigger or smaller. For instance, dark colors will make it look small, while brighter shades will make it more spacious. However, this shouldn’t limit you from using dark colors, as it can work by segmenting an accent space in the RV. Also, avoid reducing the RV’s ceiling height by using bulky material.
6. Safety Standards
Never ignore the safety standards of ceiling tiles before installing them in your RV. During installation, ensure the materials are fixed properly, and the camper ceiling is professionally treated to prevent fire hazards. If you aren’t certain about a material’s safety, seek expert advice before making a choice.
When installing your RV ceiling, first upgrade or add the insulation because it will play a critical role in retaining heat within your camper van when it is cold and keep it cool by preventing heat from getting in. This will reduce your energy consumption and costs significantly.
Which Ceiling Material is the Best Choice?
- Wood
- Metal
- Fabric
- Vinyl/PVC
- Paneling
- Plastic
- Fiberglass
Frequently Asked Questions
Can You Do The Ceiling Installation Yourself?
You can do the ceiling installation yourself with materials such as wallpapers and laminate sheets. Because this doesn’t require advanced skills. However, to install wood panels on your RV ceiling, consider seeking expert help to avoid losses and delays.
Is the RV Ceiling Material Fire Resistant?
Not all available RV ceiling materials are fire-resistant. Some ceiling materials, such as metal, are fire-resistant, and using them for RV renovations won’t void your insurance coverage. This is not true with PVC ceilings or wood without fire retardant impregnation.
How Long Will the Ceiling Material Last?
Ceiling materials like metal and vinyl are very durable and can last more than 20 years. As for fabric and wood, they can last 10-15 years.
Conclusion
Well, those are all the RV ceiling ideas I wanted to cover with you. Whether you’re going for a warm rustic vibe or a slick modern look, I hope you found the perfect ceiling solution. But besides just thinking about how it will look, be sure to also consider how long it will last.
Metal and vinyl ceiling panels are total workhorses – they can keep going strong for over 20 years with very little maintenance required. Wood and fabric ceilings have more of that cozy, homey feeling, but they’ll need some more TLC. You’re typically looking at a 10-15 year lifespan with those before they’ll need replacing.
One other big factor is your DIY skill level. If you’ve got some basic tools and know-how, options like wallpaper, laminate sheets, or fabric ceilings are doable projects to tackle yourself. But when you start getting into intricate stuff like installing wooden beams or a bamboo grass ceiling overhead, that’s where you’ll likely need to call in the pros.

I`m a current Law Enforcement Officer working within the Counterterrorism Bureau in New York State. I have been Camping for over 20 years. My styles of camping include tent, car, truck, van, and RV travel trailer. I have a YouTube channel where I teach all types of camping with an entertaining method: https://youtube.com/@TheSmallsRVAdventures


![16 Ideas That Can Make Truck Camper [Pictures]](https://camperlife.co/wp-content/uploads/2019/06/Truck-camper-23-768x513.jpg)

