Troubleshoot RV Water Pump: 5 Common Issues for Bad Pump Detected
Troubleshoot RV water pump when issues arise can quickly become a frustrating and inconvenient experience. And if you’re dealing with this for the first time, you’re likely to have some difficulty.
But don’t worry this guide will explore problems and tips to counter them with detailed diagnosing. So, let’s get started and learn how to troubleshoot your RV water pumps like a pro!
Table of Contents
RV Water Pump – A Quick Look
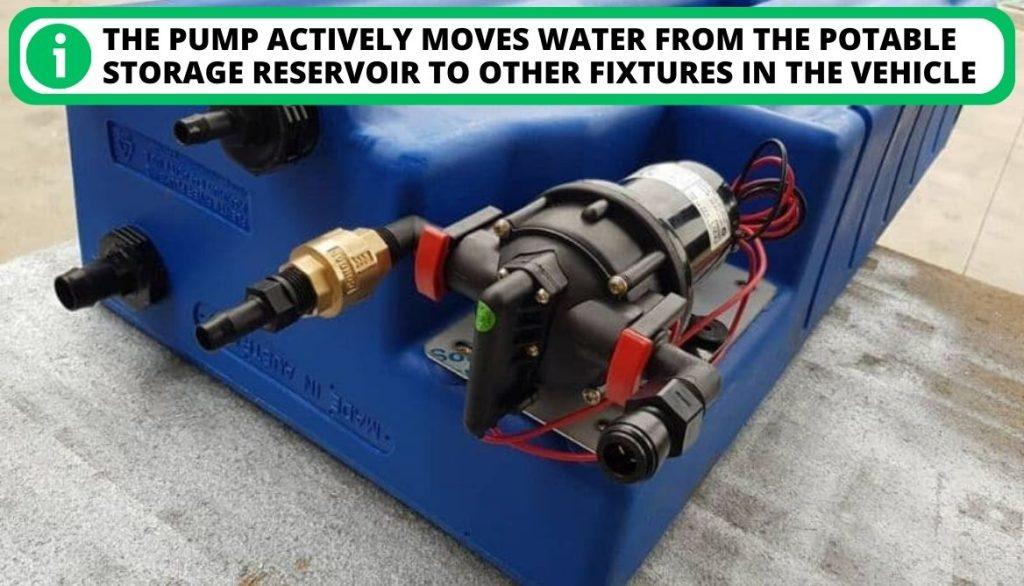
Any recreational vehicle owner knows an RV water pump is crucial in ensuring proper water supply to their mobile home:
- The pump actively moves water from the potable storage reservoir to other fixtures in the vehicle.
- This makes it essential for those who love to travel to remote areas or places without a readily available water supply.
- Usually, a 12-volt system powers the water pump in a recreational vehicle.
- With a sufficiently large battery reserve, you can power your RV water pump remotely without needing an electrical outlet.
Common Reasons for a Faulty RV Water Pump
If your water pump in a recreational vehicle suddenly stops working, there’s no need to panic. There might be several possible reasons for the malfunction. A broken water pump in an RV can be caused by various factors, such as:
1. The Motor Fails to Start
If you are attempting to draw water from your RV water pump but aren’t hearing any sounds, it is an indication that the pump is overheating. This will result in an electrical failure that is set to render the device inoperable.
Allow the device to cool down. Also, it’s essential to check if the pump has overheated and take appropriate measures to prevent it from happening again.
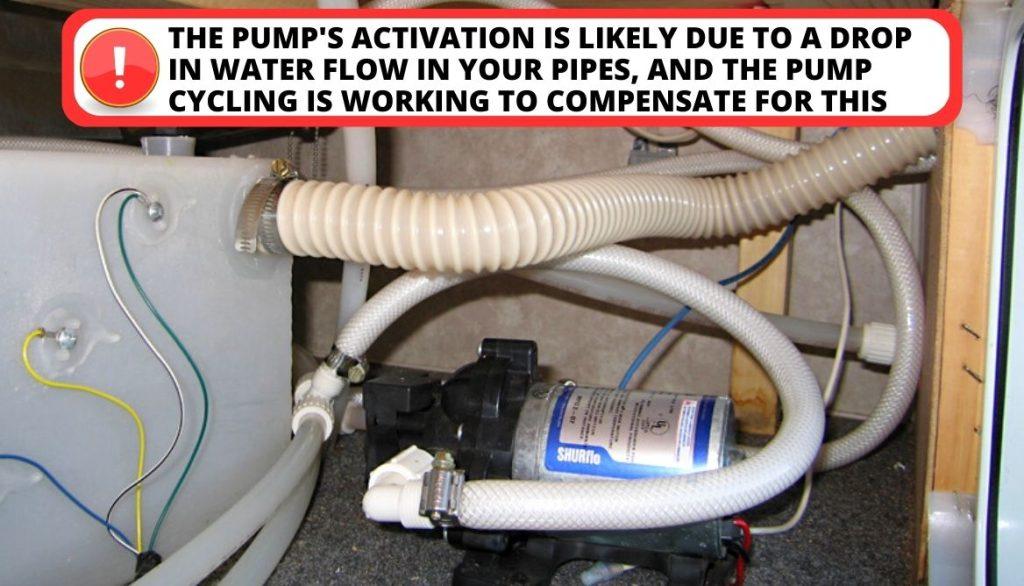
2. Motor Runs Frequently or Continuously
During camping, if you suddenly observe that your RV water pump is running while you are watching TV or sleeping, it is crucial to remember that a water pump does not typically turn on and off at random intervals. This issue may indicate a malfunction in the water system, such as:
- The pump’s activation is likely due to a drop in water flow in your pipes, and the pump cycling is working to compensate for this.
- A broken or leaking water pipe often causes this issue, and the RV water pump rotating rate can indicate the problem’s severity.
- Therefore, checking for any water dripping from every RV link and device is crucial to identify the leak’s source.
3. There is a Severe Scarcity of Water
Sometimes, when the water underground is used up, your RV’s water pump might not work as well:
- It might make more noise and give you less water.
- This is because the pump has to work harder to give you water from your faucets when the water level in your reservoir goes down.
- If you are camping somewhere that lets you store rainwater, this can help.
- You can also try getting water from the town’s water supply, but you might have to use a hose or some other way to move the water into your RV’s freshwater tank.
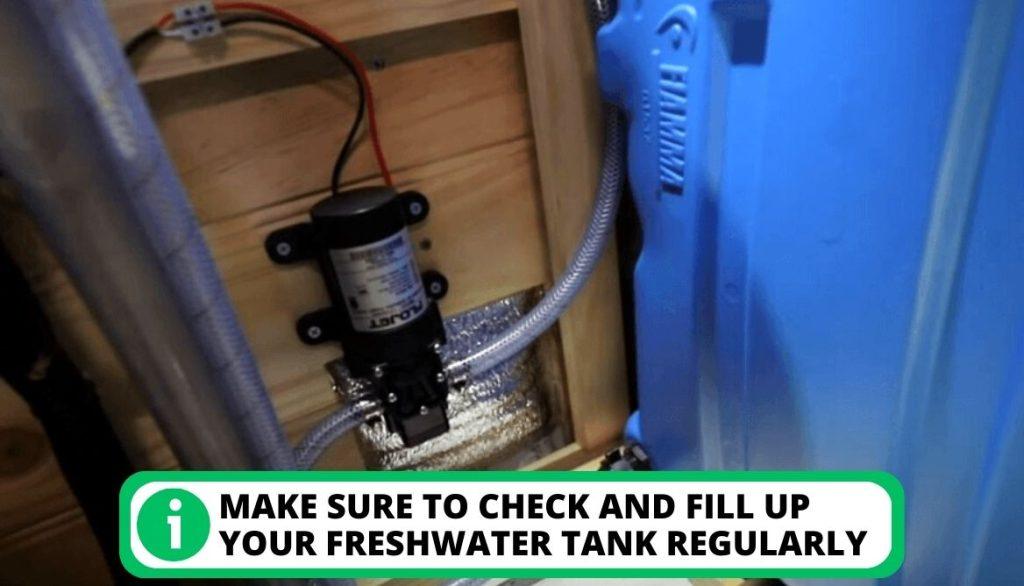
The water Pump Takes some time to Get to Normal
When you fill up your RV’s fresh water tank, it might take a while for the water pump to start working well again.
- This depends on how much air is in the pipes and how much water was left in your tank before you filled it up.
- The pump might make a noise or shake for a few hours during this time.
- Make sure to check and fill up your freshwater tank regularly. This will help your water pump work smoothly and give you a steady supply of water from your RV’s faucets.
4. The Protector Keeps Tripping
Sometimes a water pump has to work too hard, like when there’s not enough water, which can make it stop working or get too hot.
- If this happens, the breaker should stop the electricity from going to the pump to keep it from getting damaged.
- If you notice that the water heater is getting too hot, it is necessary to investigate the cause of the issue.
- A blockage in the pipes or a pinched water reserve can cause it to become too hot, leading to problems with water pressure and potential circuit failure.
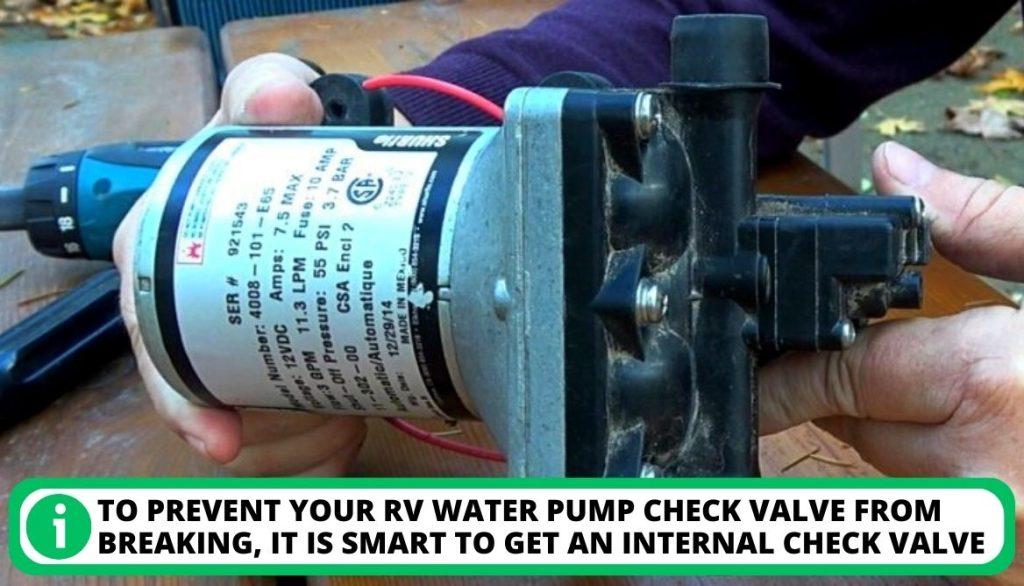
5. Ensure to Check the Valves
RV water pumps feature check valves that only allow water to travel in one direction. However, these valves may become damaged if the water pump is activated while the system is under strain from the municipal water connection.
- To prevent your RV water pump check valve from breaking, it is smart to get an internal check valve.
- Installing one is usually easy and doesn’t need any special tools or knowledge.
- If the check valve still breaks, you can fix it by turning off the freshwater tank and the main water source.
RV Water Pumps Life Span – Reviewed
The lifespan of a water pump for a recreational vehicle is typically around ten years or more. However, how frequently you use your water pump can also impact longevity.
A Further Insight
Owners who frequently engage in off-grid camping with a water tank, their water systems may wear out faster than those who use their RVs for occasional weekend trips.
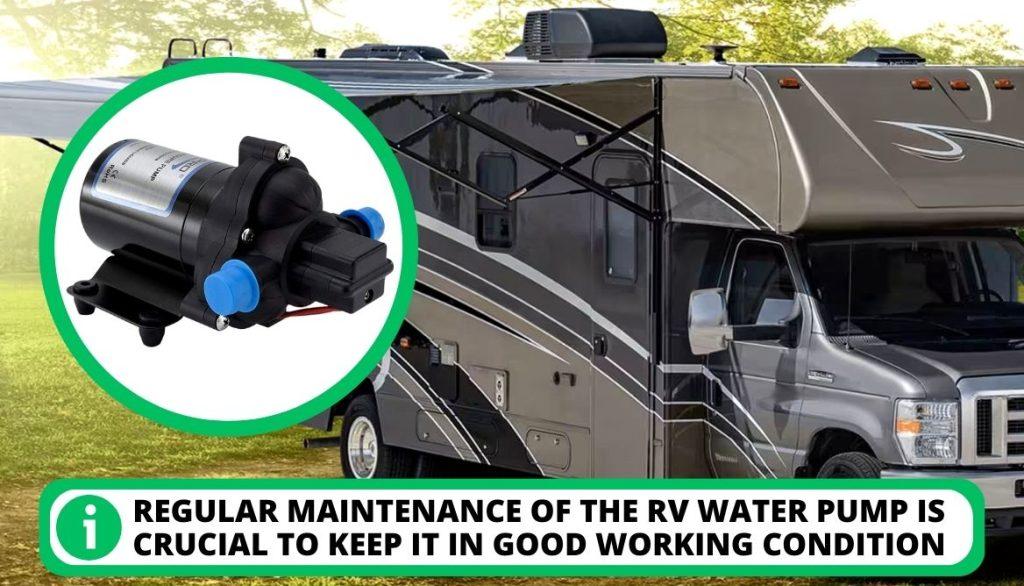
- Regular maintenance of the RV water pump is crucial to keep it in good working condition.
- Winterizing your RV’s water system is also essential if you plan on storing it during the winter months.
- It helps to protect your water pump and the entire water system from damage due to freezing temperatures.
Troubleshooting an RV Water Pump and Fixing It
If you are experiencing issues with your RV’s water pump, there are a few steps you can take to troubleshoot and potentially fix the problem. But first, there are a few necessary tools you will need.
List of Required Tools and Materials
To determine the cause of your RV water pump continuously running, you will require the following tools and supplies, depending on the underlying issue:
- Wrench
- Screwdriver
- Saw (optional)
- Pipe primer and adhesive
- Replacement of water lines or pipes
- Pliers
- Allen key
- Bucket or towels
- Pressure switch (if necessary)
- Water pump (if necessary)
General Steps to Fix a Broken RV Water Pump
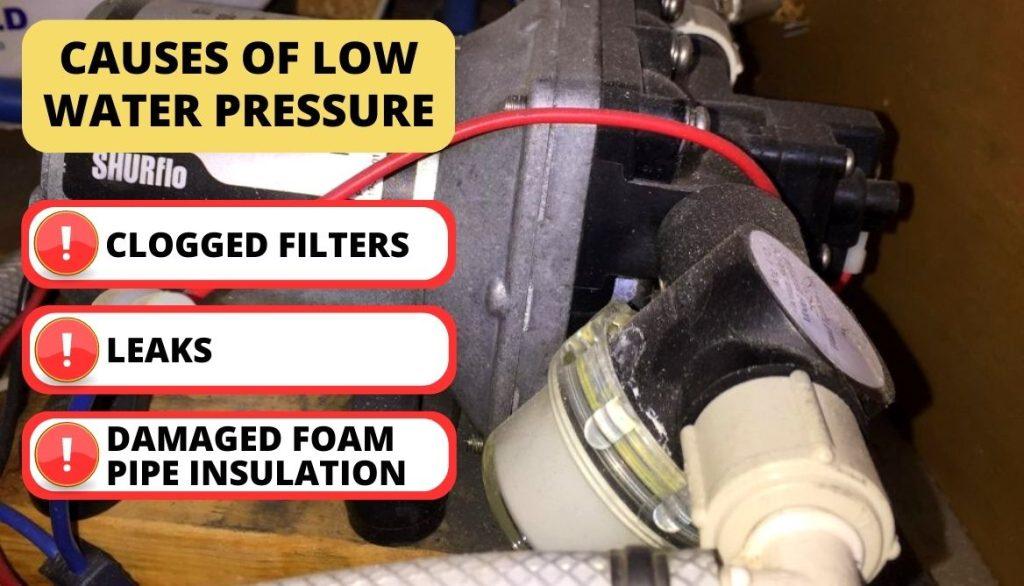
To troubleshoot the issue of a continuously running water pump in your RV, it is essential to note that the problem could be due to low water pressure. When there is a drop in water pressure, such as when a tap is opened, the water pump is designed to activate to maintain a constant flow of water.
However, if the pump cycles continue to run when no water is being used, it is crucial to inspect all pipes, valves, and connectors to locate the source of the pressure loss. Common causes of low water pressure include:
- Clogged filters
- Leaks
- Damaged foam pipe insulation
Step 1: Search for Any Water Leaks
Watch out for dripping or pooling water to detect a break in the water main. Even if you’ve traced the broken water line from the pump to each fixture in your RV and still notice these warning signs, you should inspect inconspicuous areas for potential breaks.
If you find a leak, you must fix it by repairing the faulty device or installing new water lines. A corroded washer in fixtures can be replaced easily, but if a portion of the conduit or water line leaks, you’ll need to cut it out and change it.
Step 2: Clean and Shine Screens and Filters
Suppose you are experiencing a reduced flow of water or continuously operating water pump cycles in your RV:
- In that case, another potential issue may be the accumulation of dirt and sediment in your water system.
- Using sandy or unfiltered water tank connections at campgrounds or other locations can increase this risk.
To address this problem, it is crucial to regularly clean the filters and screens in your compressor and throughout your water system. This process involves removing any buildup of dirt or sediment in the filters and screens to ensure that water can flow freely through the system.
Step 3: Make Necessary Adjustments to the Pressure Switch
Most water pumps include an adjustment wrench that allows the user to fine-tune the pressure level at which the valve turns off the water engine. Once the predetermined level is reached, the pressure valve will shut off the water pump.
To adjust the pressure level, the user can use the included wrench to turn the screw, increasing or decreasing the pump’s sensitivity to pressure changes. Depending on the type of water pump, this adjustment can be made by:
- Hand
- Wrench
- Allen key
It is essential to note that incorrectly adjusting the water pump’s pressure level can lead to issues such as reduced water flow.
- Find the bolt that can be turned to alter the parameters.
- Instruct the water to be turned on for 30 seconds before being turned off.
- Tweak the bolt until the pump stops running after you switch off the shower.
- Have the shower run for another 30 seconds to ensure the setting is correct. When the shower is shut off, the compressor should continue to operate for a few minutes. If the test takes too long, try a different option and perform it again.
- If adjusting the settings doesn’t get the compressor to shut off, you might have to swap out the pressure valve.
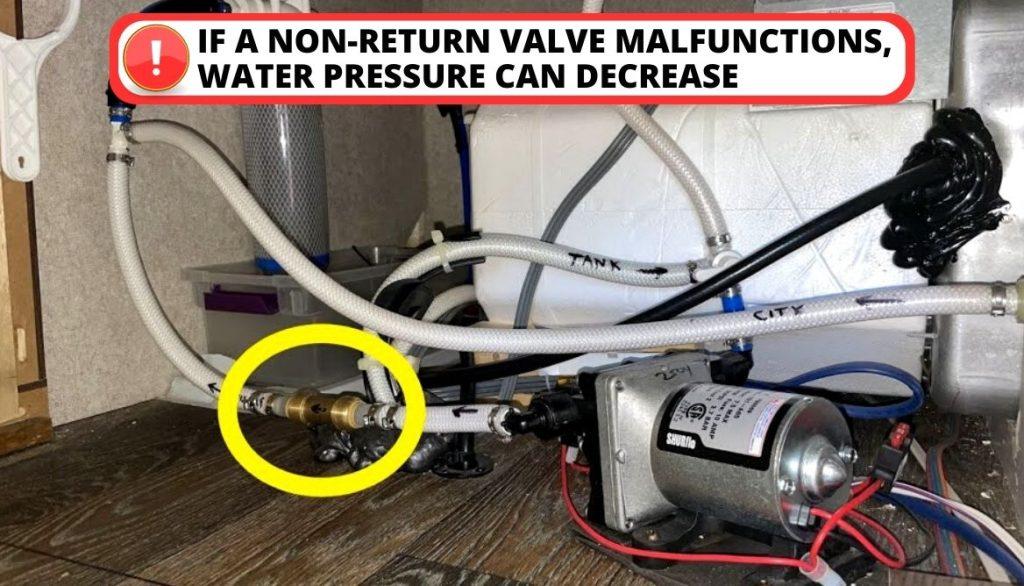
Step 4: Check for Any Potential Leaking Valves
Water systems may have non-return valves installed in their piping that only allow water to flow in one direction:
- These valves can be found on showerhead mixers’ hot and cold intake pipelines to prevent water from recirculating.
- If a non-return valve malfunctions, water pressure can decrease as it circulates back through the system, and the compressor may continue to operate even with decreased air.
- A faulty non-return valve could be the issue if there are no obvious water leaks.
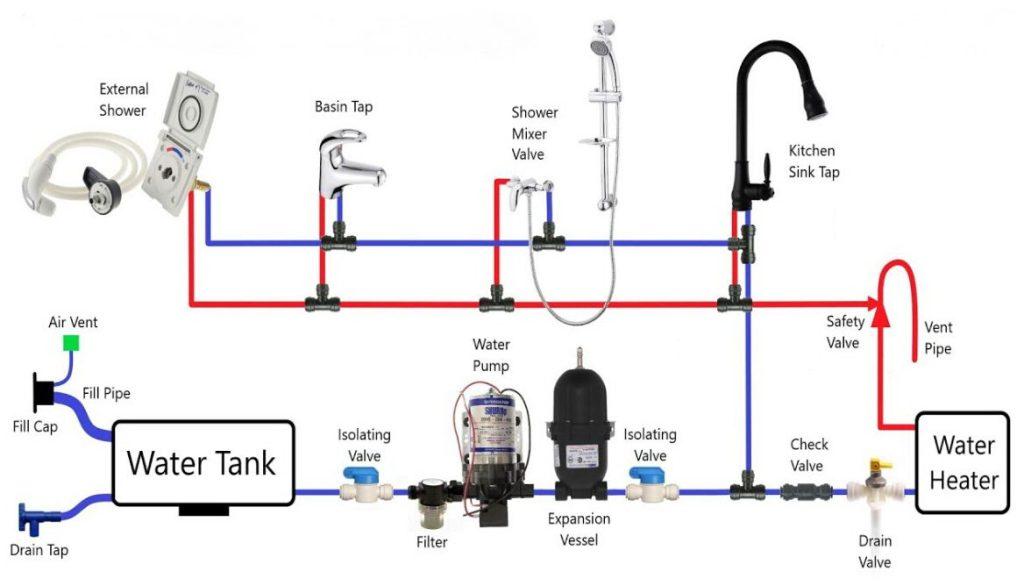
Refer to the schematics to identify and locate one-way switches in your water system:
- Inspecting the valves to ensure proper operation and clear out any potential problems is important.
- To do so, turn off the pump and empty the water tank from the conduit where the non-return valve is installed to release pressure in the water system.
- Then, you can remove the valve without worrying about water damage to your RV.
Ensure the valve is clean and debris-free to ensure smooth opening and closing. The valve’s flap or spring-loaded ball bearing should only be able to open in one direction. Start by thoroughly cleaning and descaling the valve; if something is broken, it must be replaced.
Step 5: Look for Leaking Pump Seals if Any
An RV water pump typically has an impeller, a set of revolving blades used in water turbines, to maintain the proper water pressure. The impeller is enclosed to keep the water reservoir at the correct pressure. However, the gaskets that seal the impeller over time can become worn or damaged due to strain.
Therefore, the compressor may need to be replaced if the gaskets or other internal components become damaged and the water pump no longer functions correctly.
It is also essential to perform regular maintenance on your RV water pump. Including inspecting the gaskets and other components to ensure that it operates correctly and avoid costly repairs or replacements.
Step 6: Replace the Pressure Switch
If you have inspected the valves and gaskets of your RV water pump, which appear to be functioning correctly, the problem may be with the pressure switch. The water pump switch is responsible for turning the water pump on and off when it detects changes in water pressure.

Let’s know how to fix it:
- Find the RV water pump pressure valve.
- Take the pressure valve out by unscrewing it.
- Take out the old switch and put it somewhere safe.
- If a replacement diaphragm has been supplied, it should be installed in place of the previous one.
- Replace it with a replacement pressure valve.
- Replace the fasteners and affix the replacement pressure switch.
Step 7: Purchase a New Pump in Needed
If your RV water pump is continuously running even after replacing the pressure switch or if the pump is old, consider purchasing a new water pump. Instead of opting for a professional repair, buying a new pump may be a cost-effective option, as the cost usually ranges between $75 to $150.
DIY Tricks and Tips for Replacing the RV Water Pump
You will need more effort to replace an RV water pump. However, it is still a manageable task. Here are the steps you will need to follow:
- Turn off your water pump and disconnect it from the power source. To do this, either remove the fuse for the compressor from the breaker panel or turn off the RV’s electricity.
- Turning on a spigot will allow you to empty your water storage system. When the water ceases flowing, you can switch off the tap.
- Disconnect the water pump’s locking actuator and power supply with tweezers or a screwdriver.
- Remove the inlet and exit water lines from the pump and set a container or towels under it to collect dripping water.
- The water pump can be detached from its mounting by unscrewing it.
- The previous pump’s inlet filter should be removed for complete cleaning.
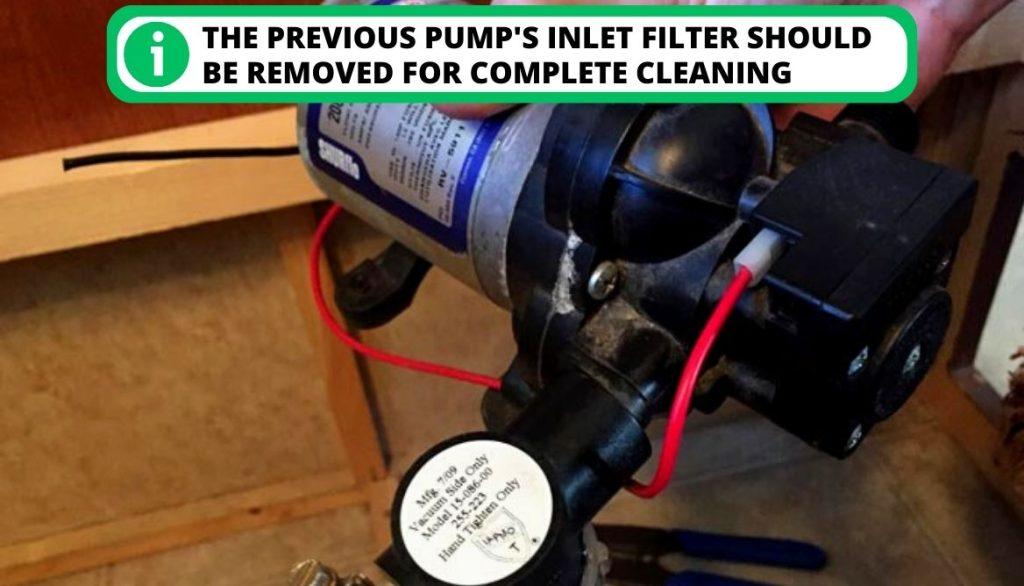
- Join the filter to the new pump’s intake.
- Install the replacement pump, then use the existing screws to secure it in position.
- Connect the water lines again to the new pump in and out ports.
- After installing the replacement pump, reconnect the latching device and power source as instructed by the manufacturer.
- Connect the replacement pump to electricity again, and activate it.
- Turn on the fixtures to see if the replacement pump works. As soon as the pump is activated, water will start to circulate.
- Make sure there are no air leaks. You should double-check the intake and exit hoses.
3 Warning Signs that Indicate that RV Water Pump is Going Bad
Regularly checking the water pump in your RV is crucial because it is an essential appliance. There are specific symptoms that indicate your pump is malfunctioning and needs replacement. Here are some telltale signs to look out for:
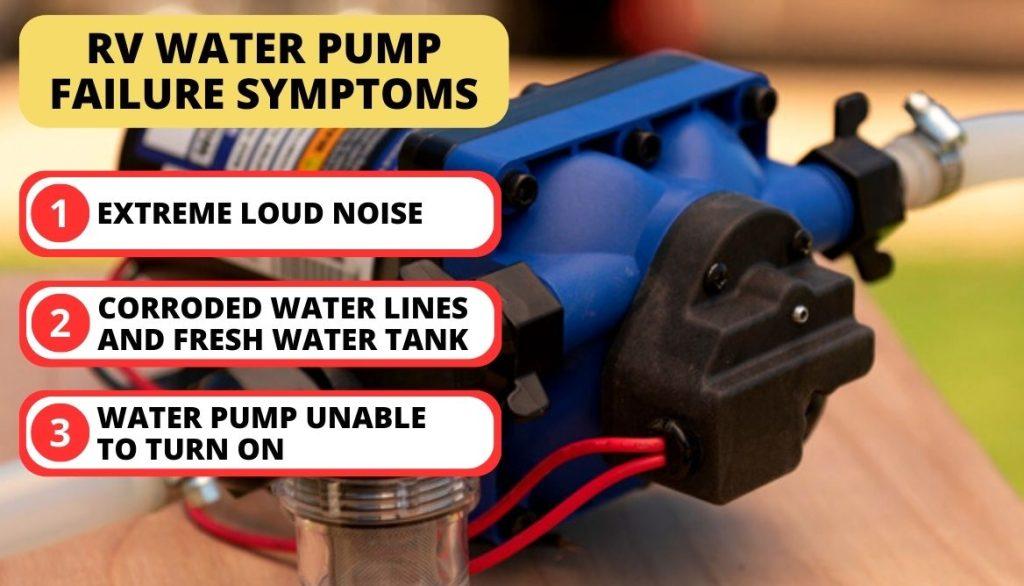
1. Extreme Loud Noise
If your water pump is making an unusual or excessive amount of noise, it could be a sign that it is nearing the end of its lifespan. This is not the typical sound that the pump makes and is worth investigating. A damaged compressor is often the cause of this issue. RV and trailer water pumps generally use a diaphragm that contains multiple chambers.
2. Corroded Water Lines and Fresh Water Tank
Water leaks indicate that your water pump is failing and requires replacement. If the source of the leak is from the water lines, it can be resolved by replacing them. However, a thorough inspection is necessary if the freshwater tank is leaking.
3. Water Pump Unable to Turn On
To diagnose the issue with your water pump, begin by inspecting the wiring. Once you have done that, move on to checking the switch and breaker of the pump. Ensure that the batteries are fully charged and operational. It is important to note that the compressor is designed to work with a 120-volt electrical system.
FAQ
Why is my RV pump not pumping water?
If your RV pump is not pumping water, it is likely due to blockage or leaks. Begin by checking for blockages and leaks from the RV’s fresh water tank or municipal supply line. Inspect every pipe and fitting that connects the water supply to your faucet.
What is the most common problem with water pump?
The most common problem with water pumps is a mechanical failure caused by worn or damaged bearings, a broken impeller, or a faulty motor. Other issues that can arise include leaks, clogs, and electrical problems.
How do I know if my RV water pump is bad?
To know if your RV water pump is bad, one of the most apparent signs that it is failing is if it produces excessive or unusual noise, different from the standard noise it typically makes.
What happens if the water pump is not working?
If the water pump malfunctions, your engine can overheat during summer or freeze in winter. This can damage various components, such as gaskets, cylinder heads, and pistons. Ultimately, it may even result in total engine failure.
How do I reset my RV water pump?
To reset your RV water pump, fill up your RV’s fresh water tank and then fully open the cold water faucets in your RV. Afterward, switch on the water pump located near your water tank. This should prime the pump, causing water to flow from the freshwater tank and out of the open faucets.
Conclusion
RV water pump troubleshooting is an essential skill every RV owner should have to ensure a comfortable and stress-free trip. Always prioritize safety when working with your RV water system and consult a professional if unsure about a particular issue.
Have you ever experienced any issues with your RV water system? What steps did you take to troubleshoot and resolve the problem? We would love to hear your experiences and tips in the comments below.

I`m a current Law Enforcement Officer working within the Counterterrorism Bureau in New York State. I have been Camping for over 20 years. My styles of camping include tent, car, truck, van, and RV travel trailer. I have a YouTube channel where I teach all types of camping with an entertaining method: https://youtube.com/@TheSmallsRVAdventures


