How To Fix RV Battery Disconnect Switch Problems: 2023 Solutions Guide
As an avid RV enthusiast who relies on my RV battery system, I know firsthand how frustrating it can be when you have RV battery disconnect switch problems. I’ve dealt with my fair share of issues over the years – from corroded terminals to faulty switches that fail to connect or disconnect the batteries properly.
When these problems pop up, it brings everything to a grinding halt. Without a functioning battery and disconnect switch to isolate the batteries when not in use, I risk gradually draining the batteries and being unable to start the engine or power the lights and appliances.
I’ll draw from my experience grappling with battery disconnect switch gremlins in this guide. I’ll walk through the most common issues and provide practical, easy-to-follow solutions to get your switch working correctly again. So let’s get started.

Table of Contents
What Is a Battery Disconnect Switch?
A battery disconnect switch is installed in a vehicle’s electrical system to manually cut off power from the battery to other electrical systems. As an avid RVer, one modification I made early on was installing a battery disconnect switch. So, what does a disconnect switch do?
- It breaks the connection between the battery bank powering my RV and the rest of the system with the flip of the manual switch.
- It prevents the battery from gradually draining as it continues powering unnecessary components.
- It cuts power even while plugged into shore power so that the batteries stay protected no matter what.
Without a disconnect switch, I’d return to dead batteries after a few weeks or months of storage and no way to start the RV.
Click the link below for better insight.
A Quick Look at RV Battery Disconnect Switch Problems
Here is a table outlining common RV battery disconnect switch problems and solutions:
Problem | Solution |
Faulty connections: | Clean terminals and tighten connections; replace worn cables and faulty switches |
Disconnected from the battery: | Check switch position; clean connections; test and replace faulty switches; address any shorts |
Incorrect switch location: | Study schematics; test with multimeter; relocate switch to correct position |
Overuse of the battery disconnect switch: | Use only for long-term storage; don't disconnect for short stops; prevent chassis battery drain |
Corrosion: | Inspect often; use dielectric grease; sealants; replace insulation; protect from moisture |
Too Hot to Handle: | Inspect wiring; tighten loose connections; clean corrosion; upsize wiring; test/replace switch; add batteries |
6 Best Solutions For RV Battery Disconnect Switch Problems
When it comes to troubleshooting common RV battery disconnect switch problems, there are several effective solutions I’ve picked up over years of trial-and-error and consultation with electrical experts. Instead of continuing to battle frustrating electrical gremlins, through expert tips and my own experience, I’ve discovered some simple yet powerful corrective measures.
In the sections below, I will elaborate extensively on the root causes and practical fixes for the six most widespread battery disconnect switch issues plaguing RVers:
1. Faulty Connections
Dealing with a faulty RV battery disconnect switch connection can be incredibly frustrating, but I resolve this common issue with some basic troubleshooting and elbow grease. I found that the following can cause faulty connections:

- Corrosion build-up on the battery terminals, cables, and switch connections leads to intermittent or weak conductivity.
- Loose wire connections that have vibrated free over time cause halting contact
- Fraying or damaged cables introduce resistance across the switch contacts.
- Cracked or worn switch housing allows dirt inside, interfering with the electrical system.
Here are some solutions that have helped me deal with the problem.
- When I find loose or intermittent connections, I tighten screws and clean corrosion. I splice worn wires and replace broken insulation or faulty switches.
- If I find the system disconnected, I check the switch position and connections. I clean any corrosion and tighten loose wires. I test switches and replace if faulty.
- If isolation capacity is limited, I study the schematics to identify the right location. I confirm with a multimeter and relocate the switch if necessary.
- If the chassis battery was drained from overuse, I set checklists and reminders to only disconnect for long-term storage.
- When I notice corrosion, I clean it off and apply dielectric grease to prevent future buildup.
Note: I always ask for assistance from a professional electrician if none of my solutions work.
2. Disconnected From the Battery
Having your RV unexpectedly disconnected from the battery bank is incredibly inconvenient, especially if out boondocking, but this common battery switch issue can typically be quickly diagnosed and resolved
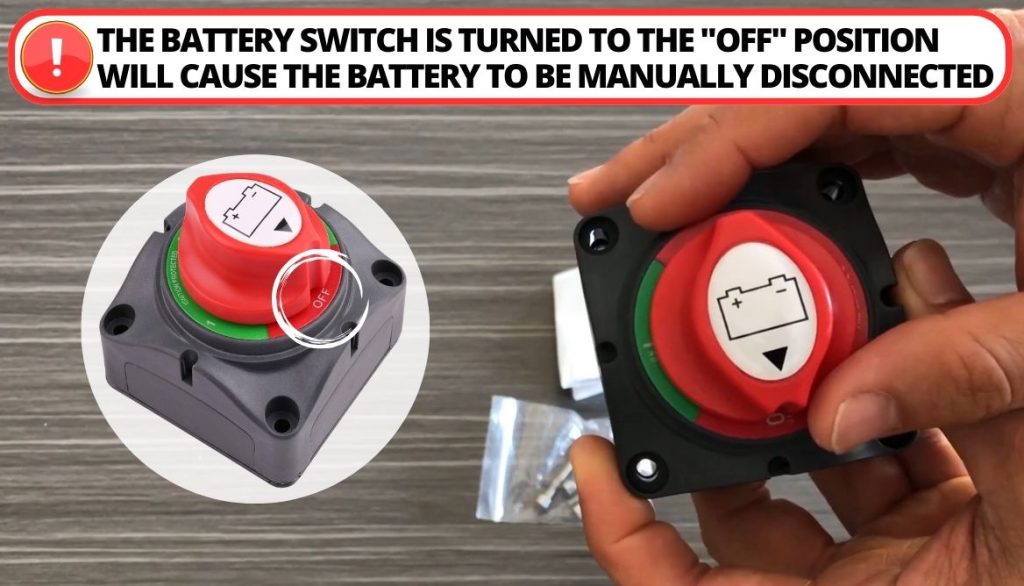
- The battery disconnect switch was flipped to the “off” position, manually disconnecting the battery.
- Corroded or frayed insulation leads to intermittent contact.
- An internal switch mechanism failure leads to the “open” position.
- Tripping a circuit breaker on the switch component or wiring path.
- Damaged or shorting wire insulation allows wires to make contact.
Here’s the approach I would take to troubleshoot based on my experience:
- Check the switch position and flip it back “on” if mistakenly powered down.
- Clean battery terminals and switch connections, then tighten any loose wires.
- Test the function of the switch itself, rapidly toggling between on/off position.
- Replace the dead switch mechanism if unable to stay connected reliably.
- Identify any short circuit triggers and address damaged wires causing faults.
- Reinforce suspect cabling segments prone to vibration damage or loosening.
Taking a focused troubleshooting approach, you can usually track down the root cause of unexpected dead batteries and tackle them quickly.
3. Incorrect Switch Location
Installing your RV battery disconnect switch in the wrong location, and positioning along the negative lead instead of the recommended positive is an easy mistake that can cause major headaches. I have found myself in that situation before. These could have been the possible causes:
- Excited to upgrade my electrical system, I installed a high-capacity disconnect switch without carefully studying the existing layout.
- I made some assumptions and didn’t accurately trace the full wiring path from the batteries to the alternator charge line.
- Reading multiple diagrams too swiftly, I positioned it along the negative lead instead of the recommended positive.
- Days later, under load, the batteries weren’t fully isolating when I switched the disconnect off before storing the trailer.
- Initially, I stubbornly defended my installation location instead of carefully testing functionality with a multimeter.
- After a more systematic assessment using schematics, I relocated the switch to the correct interval along the positive lead for reliable isolation capacity.
Here are the key solutions I employed after realizing I had incorrectly positioned my RV’s battery disconnect switch, offered from my firsthand experience:
- I carefully studied the electrical schematics again, tracing all the wiring paths from batteries to alternators to identify the optimal switch location.
- Using a multimeter, I tested voltage flows on both the battery and accessory sides of the switch to validate its isolation capacity in its current position.
- After confirming electrical power was still bleeding through to accessories after shutting off the switch, I knew relocation was necessary.
- I checked my understanding of the proper placement interval along the positive lead after batteries but before charge lines.
- Before reinstalling in the new location, I reinforced and extended wiring lengths as necessary for solid connectivity.
- Dielectric grease on all new terminal connections will help keep things running smoothly. This is among the most commonly used battery management methods in EVs.
- The switch correctly positioned in the positive lead immediately after the battery bank reliably disconnects all systems when I flip it off before storage.

4. Overuse of the Battery Disconnect Switch
RVs allow us to take off-grid adventures, but improperly using the vital battery disconnect switch can cut exciting trips short. Based on costly early mistakes, I remind all RVers that moderation is vital to preventing a dead RV battery.
Overusing your RV’s battery disconnect switch stems from a few key misunderstandings that I’ve learned to avoid the hard way:
- I did not realize it disconnected the house battery bank that powers lights and appliances separately from the chassis battery that starts the engine.
- Assuming frequent, unnecessary disconnection somehow helps protect or prolong your starting battery life.
- Flipping the switch reflexively whenever temporarily away from the RV without considering draw differences.
- Not distinguishing between short pit stops where you turn off lights vs. longer-term storage where full disconnection is beneficial.
- Forgetting previous switch-offs and returning to a dead chassis battery and inoperable vehicle.
- Getting stranded with a drained “starting” battery that disconnecting the house bank wouldn’t have prevented.
Trust me, getting towed off public lands when your engine battery dies unnecessarily is no fun.
Here are some best practices I’ve learned through costly mistakes for properly using an RV battery disconnect switch to avoid needlessly draining your engine battery:
- Only use disconnection for long-term storage when parked at home, not short stops when camping.
- Turn off lighting/appliance circuits when temporarily away instead of isolating the electrical power system.
- Tape reminder notes by switching to confirm position before hoping to drive away.
- Set a departure checklist so you don’t forget a previous disconnection.
- Have the chassis battery tested annually and charged routinely whether the switch is left on or off.
- Install a SOLPERK solar trickle charger or battery maintainer to self-charge the chassis battery as needed.
- If stranded by a dead chassis battery, confirm the switch position, then immediately call for a tow.

5. Corrosion
As an RV owner, dealing with corrosion on your battery disconnect switch components is an inevitable hassle. But thankfully, restoring full electrical conductivity is straightforward with some simple cleaning and maintenance.
Based on continual battles with corrosion on my RV battery disconnect switch, these are the most common root causes I’ve learned to mitigate:
- Moisture build-up from humidity and temperature swings in compartments housing electrical components.
- Normal oxidation of metal battery terminals and switch contacts when exposed to air.
- Road debris and dirt are blown into undercarriage spaces during travel.
- Poorly insulated or loosely capped terminals enable corrosion spread.
- Battery acid leaks coming into contact with cables or switch bodies.
- Harsh weather exposure if the battery bank is installed in unprotected bay compartments.
Here are the most effective solutions I’ve found to address corrosion on RV battery disconnect switch components, offered from hard-won experience:
- Frequently inspect electrical compartments for early signs of corrosion build-up.
- Apply dielectric grease like Mission Automotive to the battery terminal after cleaning for moisture protection.
- Spray Jet Seal anti-corrosive sealant on the body and exposed metal where possible.
- Ensure damaged insulation is promptly replaced.
- Stabilize battery terminals and lead ends to minimize vibration loosening.
- Confirm compartment door sealing and drainage to reduce moisture contact.
- Evaluate relocating components to more protected, climate-controlled spaces.
- Use protective battery terminal boots for additional leakage barriers.
6. Too Hot to Handle
Dealing with an RV battery disconnect switch that’s too hot to handle comfortably indicates a significant electrical system issue requiring prompt troubleshooting. Excess switch heat is caused by the following:

- The loose battery allows high resistance to create heat at connection points.
- Undersized wiring to switches struggling to handle large amperage draws under load.
- Failed internal components like solenoids overheating from inside.
- Excessive multiple large appliance use overtaxing system capacity.
Here are some measures I took to deal with the issue.
- Carefully inspect all switches and battery wiring for any corrosion and know how much damage is done.
- Tighten loose links and clean/reinforce suspect wires to minimize resistance by passively balancing the battery pack.
- Determine average and max amp loads to upsize related disconnect wiring potentially.
- Test and change the switches to a high current switch like ASDFGHT if heat traces back to internal failure.
- Consider installing a separate accessory battery bank if exceeding capacity frequently.
Overview Of People’s Experience With RV Battery Disconnect
Most people have had a dead battery while out camping or the switch disconnected while they are out camping. Here are some of the experiences campers reported on popular forums.
Big, A retired army MSG said:
My disconnect switch doesn’t turn off everything in my 5th Wheel so that’s why I bought a little solar panel for my batteries.
Ghen, who owned a 2017 Chevy Silverado Duramax had the following experience:
Our 2017 actually had a factory recall on disconnect switch incorrect wiring. That said, I never use it. I installed a complete disconnect at the batteries.
As I’m sure you have read, the factory disconnect needs to leave all kinds of stuff connected, trailer brakes, smoke and CO2 detectors, leveling system, and more. Your battery will be dead in a week.
FAQs
Can a Battery Disconnect Switch Go Bad?
Yes, battery disconnect switches can fail over time due to corrosion, loose connections, or mechanical wear.
Should You Disconnect Your RV Battery When Not in Use?
It’s recommended to disconnect your RV battery when in storage to prevent parasitic loads from draining it and to maximize its charge for future use.
How Does the Battery Disconnect Work?
A battery disconnect switch breaks the electrical connection between the RV’s battery and its 12V system when turned to the “off” position, preventing power drain during storage.
Conclusion
As an RV owner who depends on your battery system, I understand how vital a properly working battery disconnect switch is. If you’ve struggled with worn connections on your switch causing charging issues, try cleaning the contacts. Adding dielectric grease can help prevent future corrosion. If your switch has simply failed from use over time, replacing it with a heavy-duty model rated for high currents is wise.
Testing your new switch periodically with a multimeter can catch faulty ones before leaving you stranded. If adjusting connections, adding protections, or replacing parts still doesn’t resolve your issues, then it’s best to have your entire RV electrical system inspected by a certified professional.
So, what battery disconnect switch problems have you faced that weren’t covered here? Please share your experiences and advice in the comments to help fellow RVers.

I`m a current Law Enforcement Officer working within the Counterterrorism Bureau in New York State. I have been Camping for over 20 years. My styles of camping include tent, car, truck, van, and RV travel trailer. I have a YouTube channel where I teach all types of camping with an entertaining method: https://youtube.com/@TheSmallsRVAdventures


