Atwood Water Heater Troubleshooting Manual: 10 Problems Reviewed
Atwood water heaters are a popular choice for RV enthusiasts, providing a reliable and convenient source of hot water on the go. However, the Atwood water heater troubleshooting manual might be required if you experience issues over time that can cause frustration and inconvenience.
This article covers several common problems that can arise with these units, from pilot lights to leaking tanks. We will also explore some of the most effective safety precautions at the end.
Let’s start exploring!
Table of Contents
An Insight of Atwood Water Heater
Atwood, one of the industry leaders in RVs, offers high-quality gas or gas/electric combination water heaters for your RV.
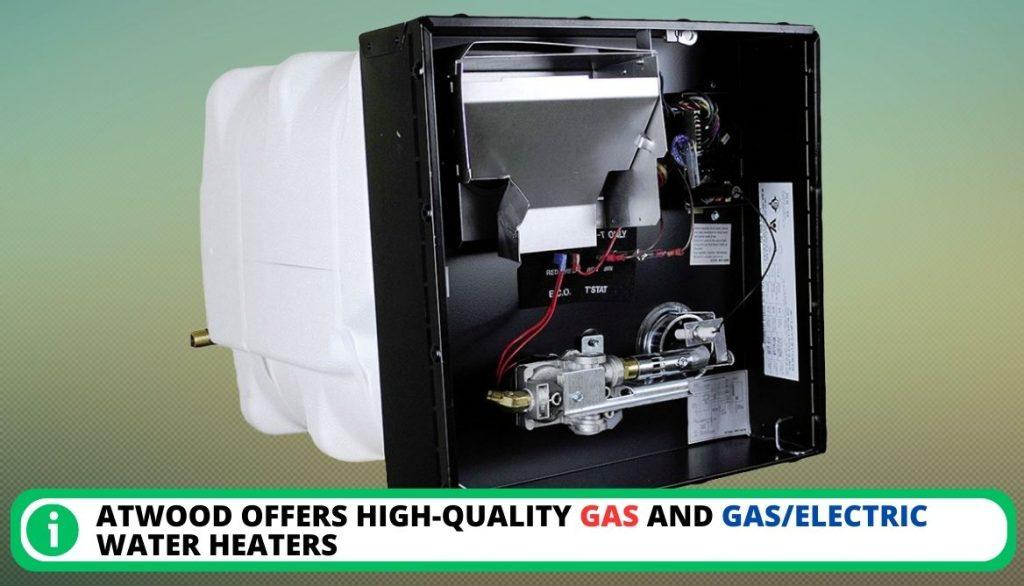
- The biggest feature of these water heaters is the incorporation of safety features, which cut power to the heater if it reaches a certain temperature or senses a power surge.
- After that, you must reset the water heater before using it again.
- Atwood water heaters are the standard for recreational vehicles, providing hot water on the road.
From tankless types and ones with tanks ranging in size from 4 to 10 gallons, there are a lot of different options. Let’s look at some of the basic reasons behind troubleshooting!
Why Would You Need To Troubleshoot?
Over time, your water heater will eventually break down due to its age and lack of maintenance. We have listed some of the main reasons below, along with their solutions.
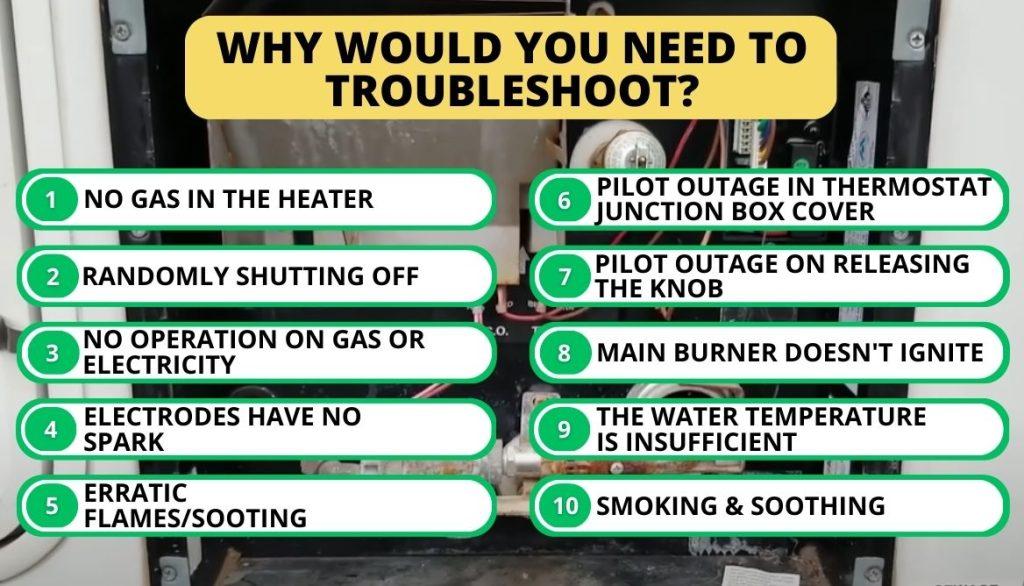
1. No Gas in the Heater
The Atwood water heater may freeze up in the event of a disruption in the gas supply. Below are the possible causes of this problem:
- Solenoid valve malfunctioning.
- Obstruction in the main burner tube or orifice.
- Problems with the electrical control unit.
- Faulty solenoid valve.
- Wiring harness wire connections.
Please follow the instructions we have included below so that it is easier to resolve the issue:
- Replace the old solenoid valve with a new one.
- Clean the orifice and burner tube using an air compressor with an attached brush.
- Secure wire connections for the E.C.O
- Replace the faulty solenoid valve.
- Properly maintain the wiring harness.
2. Randomly Shutting Off
Sometimes, the recreational vehicle’s water heater turns on but quickly shuts off. Here are a few possible reasons why that would occur:
- Failure of the thermocouple
- Control board failing
- Problems or defects in the pilot assembly
- Issues with the gas supply
- Malfunctioning gas valves
The below-mentioned fixes can be used to solve the problem:
- Replace the starter motor.
- Replace the gas valve and ensure sufficient gas flow.
- If the circuit board is damaged, replace it.
- Install a new thermocouple to replace the old one.
Note: Replacing the gas valve of the water heater will require significant time, effort, and some understanding of electricity. If you’d like to learn how to replace the gas valve, watch a video here or download the Atwood water heater manual.
3. No Operation on Gas or Electricity
There is probably a faulty water heater thermostat and control board in your Atwood water heater. Some other potential issues include:
For the gas water heater:
- Closed gas valve.
- Faulty thermocouple.
- Obstructed gas feed line.
- Dirty/Malfunctioning burner assembly.
- The pressure relief valve is stuck open.
For electric combination water heaters:
- Tripped circuit board/breaker.
- Faulty heating element.
- Sediment buildup in the tank.
- The temperature and pressure relief valve is stuck open or faulty.
- Faulty limit switch.
Try the following solutions to solve gas/electric water heater issues quickly:
- Replace the water heater thermostat.
- Install a new control board.
- Label the wires connected to the old thermostat and change them accordingly.
- Be sure to connect all wires on the thermostat junction box cover
Note: Swapping out the control board can be challenging if you need to become more familiar with the process.
To help you with this, you can watch this video on how to replace the control board.
4. Electrodes Have No Spark
The following factors may be responsible for the electrodes not producing any spark.
- Sloppy electrical connections between the electrodes and the primary burner.
- Porcelain electrodes with loose wire connections.
- The buildup of sludge on the electrodes.
- Defective electronic board.
In case of a spark issue on the electrodes, try the following methods to resolve your issue and see if the spark is restored.
- Secure the electrodes to the primary burner.
- Replace the electrodes with new ones.
- Clean off any deposits on the electrodes.
- Replace the motherboard if it is faulty.
5. Erratic Flames/Sooting
Soot formation can be attributed to inadequate gas pressure, improper main burner alignment, and a blocked burner orifice. However, there are a few more related issues to it:
- Poor gas supply
- Blocked U-tube
- Improper air adjustment
Follow these instructions to remove the soot from your RV’s water heater:
- When operating two or more gas appliances, set the intake pressure to at least 11″ W.C.
- Adjust the valve to make sure the main burner is properly maintained.
- Use a brush or air compressor to clear the burner orifice.
- Make sure not to enlarge the opening.
- Consider replacing the current gas feed with a new one.
- Set the main burner’s air shutter to be open about a quarter of the way.

6. Pilot Outage in Thermostat Junction Box Cover
Several factors cause a non-working heater pilot or RV water heater and are mentioned below:
- A malfunctioning thermocouple and gas control magnet is causing issues with your water.
- Air conditioning isn’t set correctly.
- The pilot flame in the water heater is obstructed.
- Clogging in the ‘U’ tube of the heater.
- Incorrect gas pressure selection.
A pilot flame outage is very frustrating, and replacing it may require some effort. Try the following methods for a quick solution:
- Ensure pressure is set to at least 11˝ W.C.
- Replace both the thermocouple and the gas control magnet.
- Adjust the air shutter to approximately 1/4 open.
- Clean or replace the water heater pilot light if needed.
- Clean the U tube and remove any blockages.
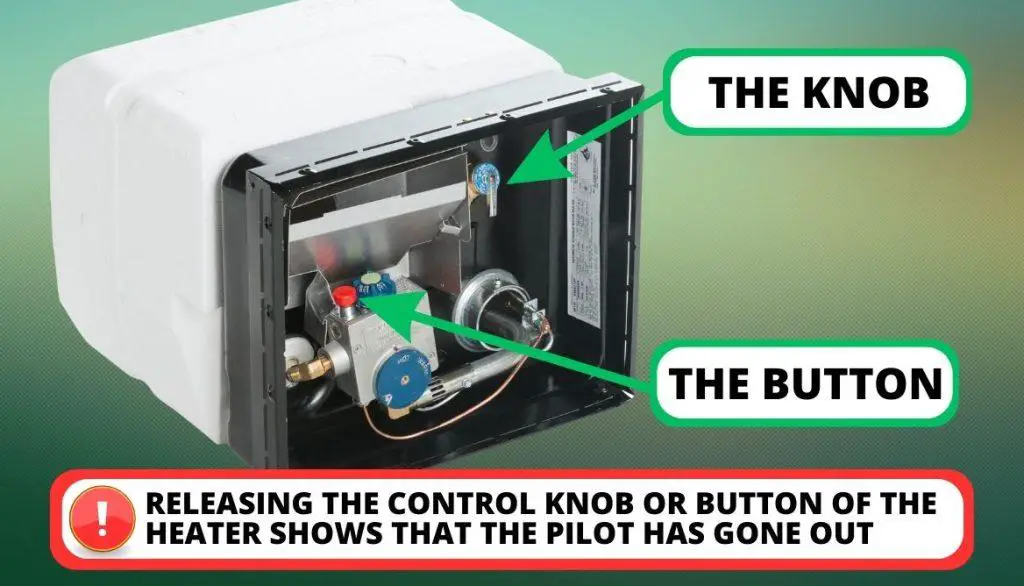
7. Pilot Outage on Releasing the Knob
Releasing the control knob or button of the heater shows that the pilot has gone out. The root cause of this issue lies in the following:
- Insufficient heat supplied to the thermocouple.
- Thermocouple not tightened properly.
- Poor gas regulation.
- Bad thermocouple.
If you want the pilot not to go out when releasing the knob or button, try the following options to see if you can get a better outcome:
- Hold the thermocouple in place for 30 seconds before releasing it.
- Ensure the thermocouple is securely locked in place.
- Replace the gas regulator.
- Install a new thermocouple.
8. Main Burner Doesn’t Ignite
The most common causes of a pilot light not igniting are as follows:
- The primary burner orifice is clogged.
- Gas regulation is problematic.
- The ‘U’ tube becomes fully blocked by soil over time.
- The primary burner is obstructed.
Igniting the heater’s main burner is not challenging; you can DIY it. However, it is best to measure the following things to get an effective solution:
- Make sure the gas control valve is in the “on” position.
- Inspect the gas line for any leaks or damage.
- If the primary burner is blocked, inspect the flue for blockages.
- Install a new gas panel to replace the old broken one.
- Remove the obstruction from the primary burner.
9. The Water Temperature is Insufficient
The following are the primary causes of the inadequate temperature of the water:
- The temperature dial is moved out of position.
- The bypass levers are in the wrong position.
- The burner is not functioning properly due to partial clogging.
- Airflow is misadjusted.
If you are facing an insufficient water temperature issue and have an oil furnace. Ensure that the oil tank is full, and the oil pump is functioning properly. Otherwise, try the following solutions:
- Inspect the flue and chimney for blockages or damage.
- Adjust the temperature dial to the correct position.
- Confirm the bypass levers are in the correct position.
- Clear any debris from the burner.
- Adjust the vents to open approximately 1/4 of the way.

10. Smoking & Soothing
Atwood water heaters produce smoke and soot due to the following reasons:
- Issues with gas supply.
- Gas pressure adjusted incorrectly by the user.
- The primary burner is not aligned.
The smoking and soothing issue is highly disliked among RV owners, but there are some potential solutions to address this issue which are listed below.
- Consider changing the gas feed if it is the source of the problem.
- Ensure the gas pressure is set to at least 11 inches W.C (water column).
- Adjust the placement of the primary burner as needed to ensure proper alignment and operation.
Atwood Water Heater Manual
This Atwood water heater manual part will cover all the essential information you need to safely and efficiently operate the unit. We will provide detailed instructions for each operation.
The first task is to dispose of the old water heater. Also, for a better understanding, you can download the Atwood water heater manual for your RV.
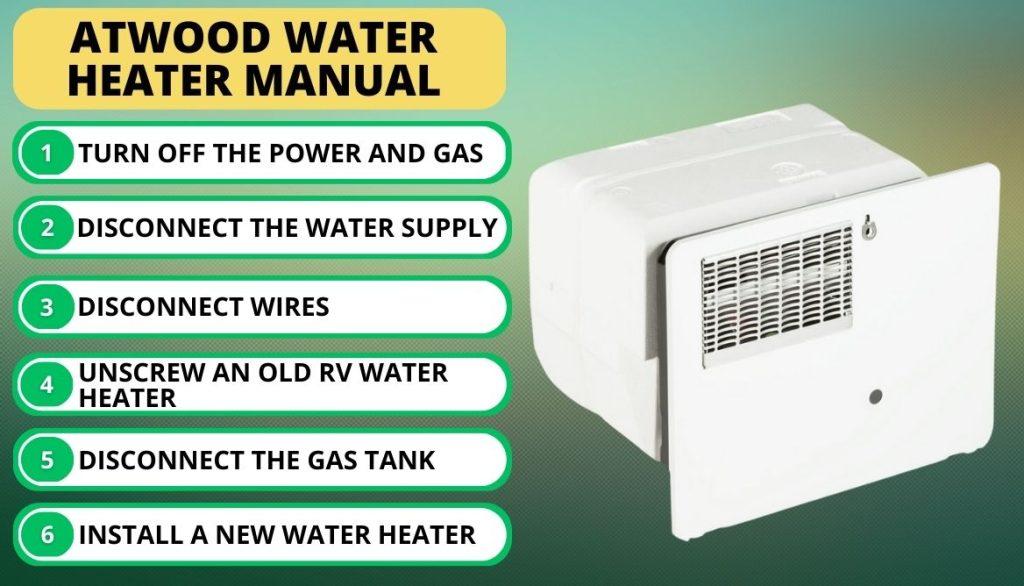
Removing an Old Water Heater
Follow these steps to effectively remove the water heater without any damage:
- First, turn off the power and gas feed to the water heater.
- Next, disconnect the water supply using the intake and discharge ports.
- If you need to disconnect wires, open the breaker box and remember the corresponding wire colors.
- Unscrew the RV water heater from the exterior to remove it.
- Finally, disconnect the gas tank and carefully remove the water heater’s wiring.
Installing a New Water Heater
Atwood offers a wide range of models for water heaters. However, with only a few minor differences, all models use a similar installation approach. Here is how you can install a new Atwood water heater in your RV:
- Using a metal or PVC connection, you can install connectors on the input and outlet of the new RV water heater before you use it.
- Place the Atwood water heater in the desired location and connect the wires using the noted color codes.
- Plug in the RV water heater and tighten the flare nut after connecting the gas line.
- Join the wires in the terminal block and connect the water supply pipes.
- Turn on the water and gas feed to ensure the heater works properly. Once the tank is full of water, turn on the heater to test it further.
You can take help from the Atwood water heater manual as well.
Frequent Thermostat Problems with Fixes
Faulty thermostats are a potential cause for the absence of a hot water supply and are a frequently occurring problem. Your furnace features an indicator light that turns on after the Atwood water heater is activated. The following issues may arise if the light does not turn on or flickers.
Problems
- Defective fuse.
- The thermostat is not working effectively.
- The wiring needs to be corrected.
- The propane tank valve is not functioning.
In this configuration, the wire is connected in series with the fuse. If the old fuse has burnt out, replace it with a new one.
Check the rating of the replacement fuse to ensure it has the same amperage as the previous one.
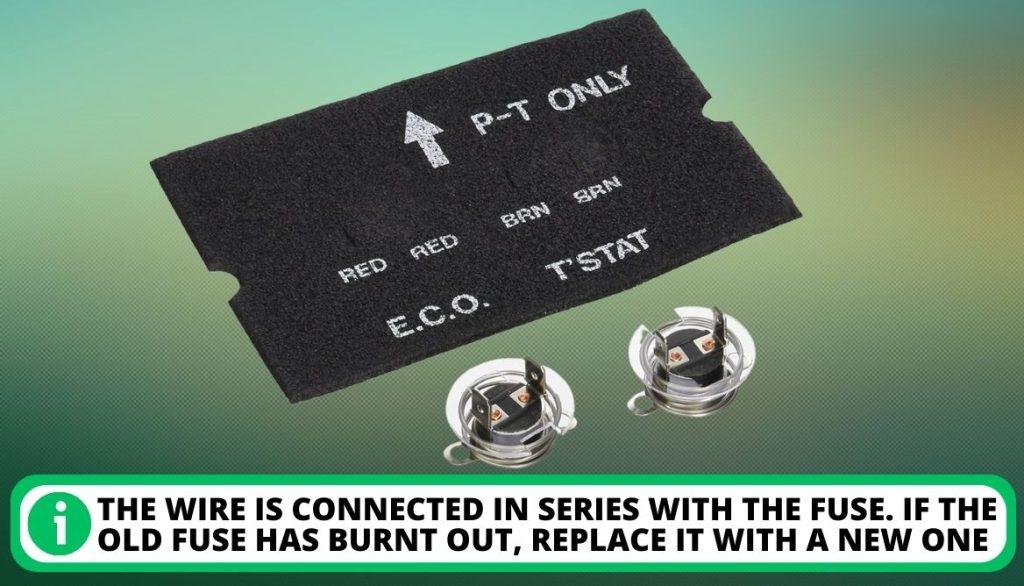
ECO Replacement
If the light remains off even after replacing the fuse, the thermostat assembly may be the cause.
- The ECO and Thermostat assembly can be replaced and found at various online retail outlets.
- When you remove the terminals, take note of the wires’ original position.
- If you remove the lid, you’ll notice a pair of male plugs inside.
- Turn them counterclockwise to remove them, and replace them with new ones.
- Get the kit that matches your water heater.
Warning and Safety Precautions
Taking the warnings seriously and carefully considering safety measures is important to avoid financial losses and prolong your Atwood water heater’s lifespan.
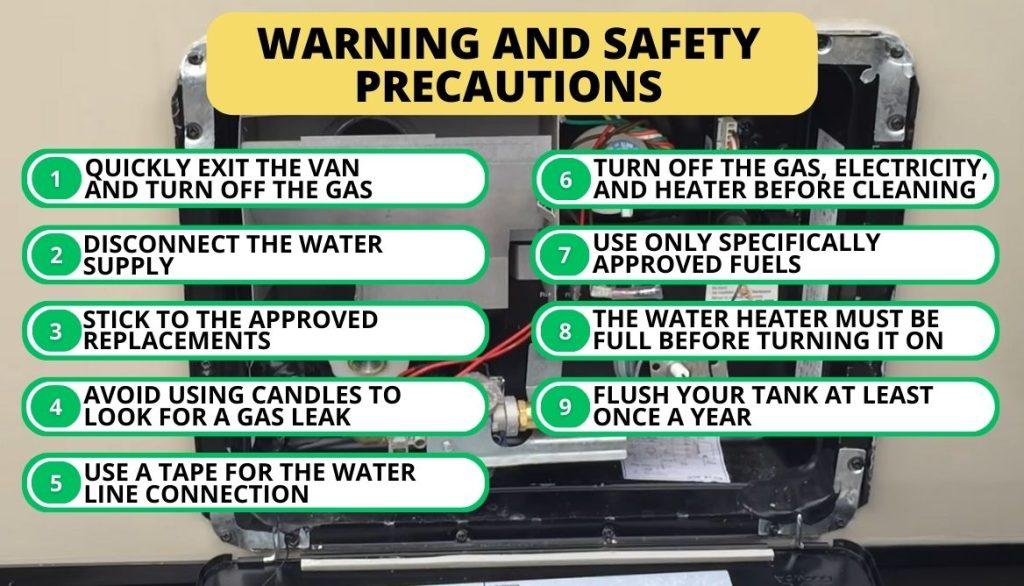
- Quickly exit the van and turn off the gas feed to prevent possible ignition. Do not use anything that may ignite; seek expert help.
- Do not make any adjustments to the hot water heater before usage. Never change anything.
- Stick to the approved replacements where possible. Do not try to put anything with a different value, either higher or lower.
- Avoid using candles to look for a gas leak. Instead, check for leaks using a soapy or commercially available leakage-checking solution.
- Use Teflon or plumbing tape while connecting the water line connection to prevent water leaks from the hot water tap.
- Before cleaning the tank, turn off the gas, electricity, and heater. Relieve the pressure via the valve.
- Only use fuels that are specifically approved for use. Using an unapproved fuel source is not recommended.
- Make sure the water heater is entirely full before turning it on.
- Flush your tank at least once a year. Empty the tank and refill it with new water using a pump for five minutes to flush it.
Atwood Water Heater Troubleshooting Manual – FAQ
Why is my water heater not making hot water?
If your water heater is not making hot water, there could be due to a blown fuse or tripped circuit breaker. In addition, some electric water heaters may have a circuit-style safety switch located on or near the thermostat.
What causes an Atwood RV gas water heater to not fire up?
A lost pilot is one of the most common problems with the Atwood-manufactured RV hot water heater. It happens if the thermocouple is not working properly or the gas control magnet weakens.
How do you start an Atwood water heater?
To start an Atwood water heater, turn on the propane gas supply. Then, turn the temperature control knob to the “Pilot” position. Press and hold down the pilot button for at least 30 seconds to allow the thermocouple to heat up and signal the gas valve to open. You can check the Atwood water heater manual for assistance.
Where is the thermostat on an Atwood water heater?
The thermostat on an Atwood water heater is typically located behind the access panel on the front of the unit. To access the thermostat, you must remove the cover by unscrewing the screws that hold it in place.
How do you fix water not getting hot?
To fix the water not getting hot issue, firstly, if your hot water heater suddenly stops producing hot water, you should check the fuses and circuit board/breaker. If that is not the issue, you may need to replace the heating element, which could have burned out.
Conclusion
Atwood water heaters are a dependable and convenient source of hot water, but they can experience issues that require timely maintenance. By recognizing and addressing issues like faulty pilot lights or leaky tanks, you can extend the lifespan of your Atwood water heater. It will help you avoid costly repairs or replacements down the line.
Have you ever experienced any issues with your RV water heater? What steps did you take to resolve the issue? Share your experience with us in the comment section below.

I`m a current Law Enforcement Officer working within the Counterterrorism Bureau in New York State. I have been Camping for over 20 years. My styles of camping include tent, car, truck, van, and RV travel trailer. I have a YouTube channel where I teach all types of camping with an entertaining method: https://youtube.com/@TheSmallsRVAdventures


