

Are you here searching for solutions to Lippert slide-out problems? If so, you’re in the right place. This guide is your go-to resource for troubleshooting. Slide-out systems are found in various Lippert RV models, and I’m here to walk you through resolving the 10 most common issues including faulty motors, power issues, and room stalling in mid-travel.
Moreover, I’ll ensure you’re well informed about the safety considerations. So, without wasting any time, let’s get started!
An Insight Into Lippert Slide Outs
However, Lippert is a big company that makes these for RVs in the US. They started doing this in 1957 and have been doing a good job since then. Lippert’s slide-outs are like special rooms that can make RVs more spacious.

They work by moving outwards when you press a built-in switch. Some have electronic systems that help them move, while others move manually. Now, let’s have a look at some positive aspects of Lippert slide-outs:
[su_list icon=”icon: check” icon_color=”#00cf77″]
- They are made from a strong and light material that doesn’t get rusty.
- These slide-outs are not heavy, so they maintain the overall weight of the RV.
- Slide-outs can be installed in RVs with walls that are 25 to 38mm thick.
[/su_list]
RV Slide Outs Problems and Solution Table at the Glance
Buying these slide-outs might be beneficial in most cases, but they can also develop some problems over time. They may differ depending on how you have used your RV over the years.
So, for that, I have outlined the most common problems along with the solutions to help you have a hassle-free camping experience. Let’s check out the table.
[wptb id=3013909]Now that we have quickly gone through the table, let’s explore each problem in detail!
10 Major Lippert Slide-Out Problems and Fixes
Listed below are the 10 most common problems and the possible reasons behind them. Read on to learn about their in-depth solutions:
Problem 1: The Switch Doesn’t Move the Room
When I manually pushed the switch to extend or retract the slide-out room, it remained stubbornly stationary.

Possible Causes
Upon research, I found out that this frustrating situation can arise from various underlying causes.
[su_list icon=”icon: check” icon_color=”#00cf77″]
- It’s possible that debris or worn-out components are obstructing the smooth movement of the room within the system.
- If the battery powering the RV slide has a low voltage, there might not be enough power to move the room.
- Faulty or damaged wiring can disrupt the flow of electrical signals needed for proper functioning.
- A blown fuse in the system can act as a roadblock, preventing the room from responding.
[/su_list]
[su_box title=”Solution” style=”default” box_color=”#0CB964″]
To mitigate this issue, try out the following solutions:
[su_list icon=”icon: chevron-circle-right” icon_color=”#00cf77″]
- Conduct a thorough inspection of the system to identify any obstructions. If debris is present, remove it, and if parts are worn out, replace them to ensure smooth movement.
- Test the battery’s voltage and charge it if necessary to provide sufficient power for the slide-out mechanism.
- Locate the fuse responsible for the slide-out system and check if it’s blown. If so, replace it with a new one to restore functionality. [/su_list][/su_box]
You should also examine the wiring and battery terminals meticulously for any signs of loose hydraulic system connections, corrosion, or disconnected wires.
Problem 2: The room Doesn’t Move Even with the Actuator Motor Running
Despite hearing the actuator slide-out motor running, the slide-out room remains motionless, causing confusion and concern.

Possible Causes
The following causes are the main reasons behind this issue.
[su_list icon=”icon: check” icon_color=”#00cf77″]
- The actuator, responsible for facilitating the movement of the slide-out room, can be not properly connected to the drive bracket. This can disrupt the transfer of energy required for movement.
- A malfunctioning slide-out motor or a damaged gear housing can stop the energy conversion necessary to move the room.
[/su_list]
[su_box title=”Solution” style=”default” box_color=”#0CB964″]
To move the room, you must do the following:
[su_list icon=”icon: chevron-circle-right” icon_color=”#00cf77″]
- Carefully examine the actuator’s attachment to the drive bracket. Look for signs of looseness or misalignment.
- Ensure that jam and Nylock nuts are adjusted correctly and tightly secured. Tightening these nuts might rectify the issue smoothly.
- If tightening the attachments doesn’t provide results, focus on inspecting the motor and gear housing. If the motor is dysfunctional, replacing it is the only solution.
- Similarly, if the gear housing is damaged, it needs to be replaced to restore smooth functionality. [/su_list] [/su_box]
Problem 3: Room Stalling During Travel
While extending or retracting the slide-out room, it unexpectedly comes to a halt midway through its movement, causing frustration and inconvenience.

Possible Causes
If the actuator, responsible for converting electrical energy into mechanical movement, is compromised, it can result in inefficient energy transformation. Also, Electrical RV slide-out issues within the most common RV slide system can lead to sudden stalling during movement.
[su_box title=”Solution” style=”default” box_color=”#0CB964″]
Here’s the best fix to deal with room stalling:
[su_list icon=”icon: chevron-circle-right” icon_color=”#00cf77″]
- Many common RV slide systems come equipped with a manual overriding feature. In the event of a mid-travel stall, using this manual option can often help move the room to its desired position. This action might even resolve the problem by realigning components.
- If the stall continues despite manual override attempts, the actuator might be damaged. Replacement of the actuator is necessary for the slide-out room to function smoothly once more. [/su_list] [/su_box]
Problem 4: Power Issues
Pressing the button for retraction or expansion of the RV slide sometimes shows no response. The slides, which function as an additional room, fail to move as expected.

Possible Causes
The following things can be the reason behind this issue:
[su_list icon=”icon: check” icon_color=”#00cf77″]
- There could be a problem with the electrical connection to the slide switch.
- Over time, vibrations and movement can cause wiring to come loose, disrupting the electrical signal.
- The switch itself might be damaged or malfunctioning.
[/su_list]
[su_box title=”Solution” style=”default” box_color=”#0CB964″]
These types of issues can be stressful. So, to eliminate these, apply the following solutions:
[su_list icon=”icon: chevron-circle-right” icon_color=”#00cf77″]
- Using a voltmeter, check the voltage at the button switch to determine if it’s receiving power. If the voltage is absent, there might be an issue with the electrical supply.
- Thoroughly inspect all wiring related to the slide mechanism. Reconnect any loose wires and replace any damaged ones.
- If the button switch is identified as faulty, consider replacing it with a new one to restore proper functionality. [/su_list] [/su_box]
[su_note note_color=”#9ee7b3″] Note: It’s important to note that slides can only be operated when the vehicle is parked. [/su_note]
Problem 5: The Motor Might Be Faulty
If all attempts to diagnose the issues fail, it’s possible that the motor responsible for driving the slide-out has malfunctioned. However, testing the motor’s condition requires its removal. This is the sole possible cause that I found after trying all the above solutions.

[su_box title=”Solution” style=”default” box_color=”#0CB964″]
The solutions to making the faulty motor work can vary, such as:
[su_list icon=”icon: chevron-circle-right” icon_color=”#00cf77″]
- Disconnect the motor from the slide-out and test it using a voltmeter. Measure resistance readings when connecting the motor to a battery to assess its condition.
- If you’re unsure about handling the motor testing, you can manually retract the slides using the provided manual wheel.
- Moreover, if the motor is damaged, reaching out to Lippert for replacement parts is necessary. Provide them with accurate information about the issue for effective RV technician assistance. [/su_list] [/su_box]
Problem 6: Side Tube Contamination
One of the challenges that many RV owners may encounter with their slide-out systems involves unexpected issues in the smooth movement of the extensions. This disruption in the normal functioning of slides can be traced back to the contamination of the side tubes.

Possible Cause
The root cause of this issue lies in the accumulation of substances like dirt, mud, and ice on the side tubes.
[su_box title=”Solution” style=”default” box_color=”#0CB964″]
Possible solutions to this issue vary. However, the following tips prove to be more useful:
[su_list icon=”icon: chevron-circle-right” icon_color=”#00cf77″]
- To rectify this problem and restore the proper functioning of slides, thorough cleaning of the side tubes is necessary.
- Employing a high-pressure water spray can be effective in dislodging and removing the dirt, mud, or ice deposits that are obstructing the movement. [/su_list] [/su_box]
Problem 7: Syncing Issues
RV owners might come across a perplexing situation where the slide-outs fail to operate in a synchronized manner. Instead of moving uniformly, these slides might extend or retract at different intervals, leading to a disconcerting lack of movement.

The term “out of sync” aptly describes this issue, indicating that the slides are no longer in proper coordination with each other. They exhibit irregular movement patterns, with each side not moving simultaneously or uniformly.
[su_box title=”Solution” style=”default” box_color=”#0CB964″]
Addressing this concern involves a systematic synchronization process:
[su_list icon=”icon: chevron-circle-right” icon_color=”#00cf77″]
- Start by extending all the slides fully.
- Subsequently, retract them slightly by using the retraction buttons and then allow them to extend out again.
- Repeat this procedure until all slides start operating at the same time. [/su_list] [/su_box]
Problem 8: Damaged V Roller
RV enthusiasts using Lippert slide-out systems, specifically those equipped with V-rollers, might encounter difficulties arising from damaged or malfunctioning roller components.

Possible Causes
V-rollers, which play a pivotal role in the smooth motion of slide-outs, can become compromised due to several factors. These include:
[su_list icon=”icon: check” icon_color=”#00cf77″]
- Bearing excessive weight;
- Inadequate lubrication;
- Encountering obstructions that impede their free movement.
[/su_list]
[su_box title=”Solution” style=”default” box_color=”#0CB964″]
To mitigate this issue and ensure proper functionality:
[su_list icon=”icon: chevron-circle-right” icon_color=”#00cf77″]
- Maintain the V-rollers by providing adequate lubrication to ensure friction-free movement.
- Always adhere to the weight capacity recommendations provided in the RV owner’s manual to prevent undue strain on the V-rollers. [/su_list] [/su_box]
Problem 9: Excessive Load Problems
While slide-out systems offer convenience and extra space in RVs, certain slide-outs are not designed to bear heavy loads due to their structural characteristics.

Possible Causes
The following can be the reasons behind the load issue:
[su_list icon=”icon: check” icon_color=”#00cf77″]
- The design and mounting configuration of specific RV slides makes them less resilient to excessive weight.
- Their construction might not be optimized to handle heavy loads.
[/su_list]
[su_box title=”Solution” style=”default” box_color=”#0CB964″]
To mitigate this issue and prevent potential damage:
[su_list icon=”icon: chevron-circle-right” icon_color=”#00cf77″]
- Exercise caution and avoid placing heavy items inside slide-outs that are not built to handle significant weight.
- Seek alternative storage solutions within the RV for carrying heavier items.
- Follow recommended weight restrictions in the owner’s manual to ensure the longevity of slide-outs and prevent structural damage. [/su_list] [/su_box]
Problem 10: Squeaking and Noices
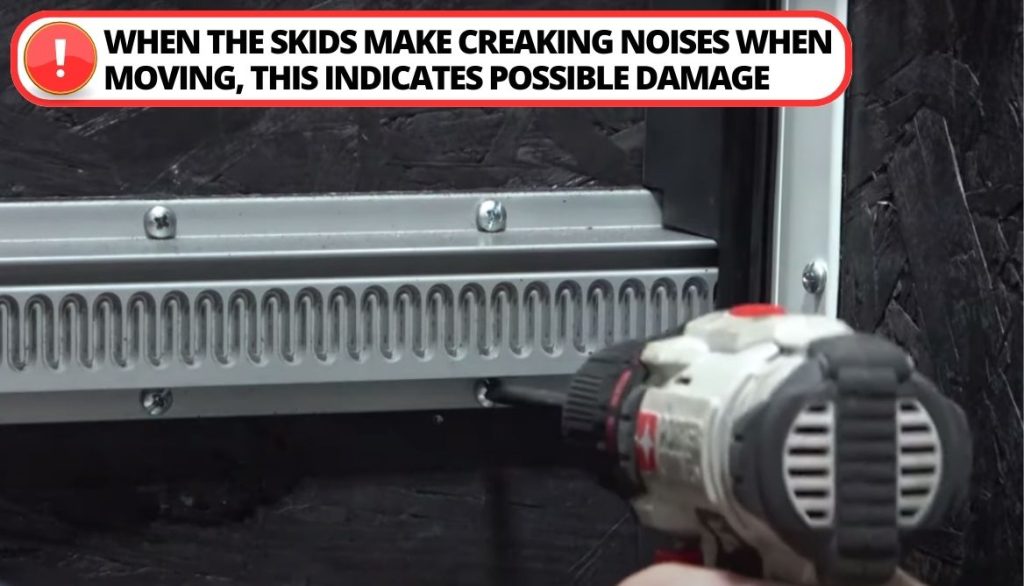
A smooth and quiet operation is expected during the extension and retraction of slides in RVs. However, there are instances where slides emit unusual squeaking or screeching sounds during their movement.
Possible Causes
Here are the reasons that I found behind the irritating noises:
[su_list icon=”icon: check” icon_color=”#00cf77″]
- These sounds are indicative of friction or potential damage occurring during the slide-out movement.
- It could result from parts rubbing against each other or mechanical components suffering from wear or damage.
[/su_list]
[su_box title=”Solution” style=”default” box_color=”#0CB964″]
Address this concern by following these steps:
[su_list icon=”icon: chevron-circle-right” icon_color=”#00cf77″]
- Immediately cease the operation of the slide-outs upon hearing unusual sounds to prevent further damage.
- If necessary, consider seeking assistance from experts to ensure the safe and efficient repair of the slide-out RV system. [/su_list] [/su_box]
Manual Slide-Out System Override: Easy Steps to Follow
There might be situations when you need to take control of the slide-out system manually. In this section, I will guide you through the process of manually overriding the system, offering step-by-step instructions for both the outside and inside frames. Let’s begin!
Outside Frame
This extension is located on the outer side of the main chassis rail. Follow these steps to operate the slide-out manually:
[su_list icon=”icon: chevron-circle-right” icon_color=”#00cf77″]
- Step 1: Find the crank extension with the pin on the outer side of the chassis rail. This is where the crank handle connects for manual extension and retraction of the slide-out room.
- Step 2: To retract the slide-out, turn the crank handle in a clockwise direction. For extension, turn it counterclockwise (opposite direction). [/su_list]
Inside Frame
When you’re inside your RV, you can manually control the slide-out system using the actuator’s top hex head crank extension inside the chassis main frame. Follow these steps:
[su_list icon=”icon: chevron-circle-right” icon_color=”#00cf77″]
- Step 1: Look for the hex head crank extension on top of the actuator inside the main frame of the chassis.
- Step 2: To retract the slide-out, rotate the extension in a clockwise direction using a 3/4” socket and ratchet. For extension, turn it counterclockwise. [/su_list]
[su_note note_color=”#9ee7b3″] Pro Tip: Whether you’re using the outside or inside frame method, it’s necessary to remember that the system is designed to allow for manual control without disconnecting the motor. This means you can engage the manual override without the need for complicated motor disconnection procedures. [/su_note]
4 Important Safety Considerations
In situations where professional assistance might not be readily available, it’s valuable to have some basic slide-out repair knowledge. Ensuring safety during slide-out maintenance is crucial to prevent accidents. Remember these essential safety practices:

[su_list icon=”icon: check” icon_color=”#00cf77″]
- Park on Level Ground: When working with your slide-out system, ensure that your RV is parked on a surface that is both level and stable. If possible, use a leveling tool to make sure your RV is properly balanced. This provides a safe foundation for any maintenance tasks.
- Switch Off and Disconnect: Before you begin inspecting or working on the slide-out system, make sure the slide-out is switched off. Additionally, disconnect the battery from the RV’s electrical system. This precaution helps prevent any accidental movements or electrical mishaps while you’re working.
- Ensure Clear Space: Prior to operating the slide-out system, check to make sure that no one is close to the slide-out room, whether inside or outside the RV. This prevents the risk of someone getting caught or injured as the slide-out moves.
- Travel with Tools: It’s a good idea to keep a power drill with a hex-knot adapter handy during your travels. This tool will be invaluable for manual override situations. The manual override system operates with a turn gear ratio of about 200 to 1. This means that for every inch you want to move the slide in or out, you might need to crank the manual valve around 200 times.
[/su_list]
FAQ
How do you manually operate a Lippert slide-out?
How do I reset my Lippert slide control?
What causes the slide-outs not to work?
How do you sync Lippert slides?
Conclusion
The final say is that familiarizing yourself with the most common Lippert slide-out problems is essential. So, if you encounter problems like dealing with faulty motors, replace the broken parts as early as possible.
Moreover, if your room doesn’t move, I would suggest you check out the actuator’s attachment to the drive bracket and fix the loose connections. Similarly, for syncing concerns, follow the systematic synchronization process.
Well, what strategies have you applied when facing such problems? Write about your experiences in the comments section below.